
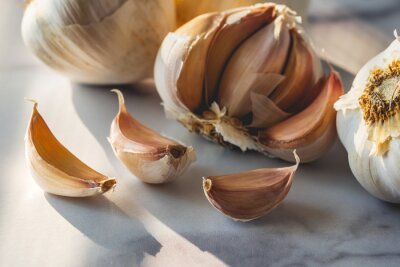
Peeling garlic is the tiny kitchen task everyone hates disproportionately. The papery skins cling, your fingers get sticky, and for a recipe needing six cloves you’re suddenly spending five minutes on prep that should take thirty seconds. It feels like there has to be a better way — and there is. Three of them, actually.
I’ve timed all the popular methods, from internet-famous to chef-approved. The results surprised me: the fastest method isn’t the trendiest one. Here’s the honest breakdown of the easiest way to peel garlic quickly, when to use each method, and which viral tricks to skip.
Method 1: The Shake (Easiest Way to Peel Garlic in Bulk)
Put the whole head of garlic (or as many loose cloves as you need) between two bowls — or in a lidded jar or cocktail shaker — and shake vigorously for 15 to 20 seconds. The cloves batter against each other and the container, and the skins slip right off. Open it up and you’ll find naked cloves with the papery skins separated. It looks like a magic trick the first time.
This method shines when you need a lot of garlic — a whole head or more. For one or two cloves, the setup isn’t worth it. Tips for success: separate the head into individual cloves first (smash the head with your palm to loosen them), use metal bowls for maximum impact, and shake like you mean it — timid shaking gives timid results. Dried-out older garlic works less well since the skins adhere more tightly; this method loves fresh, plump heads.
Methods 2 and 3: Smash and Microwave
The smash method is the chef’s default: lay the flat side of a chef’s knife over a clove and give it a firm whack with your palm. The skin loosens instantly and lifts off in one piece, and the lightly crushed clove releases more flavor — a bonus, since crushing activates the compounds that give garlic its punch. It’s the fastest method for 1 to 4 cloves and requires zero special equipment. Just keep your fingers clear and use controlled force; you’re cracking the skin, not obliterating the clove.
The microwave trick: 10 to 15 seconds on high loosens skins remarkably well, especially on stubborn cloves. The gentle heat creates steam between the clove and skin. But it’s easy to overshoot — 20+ seconds starts cooking the garlic and dulling its flavor. I use it as a rescue move for one difficult clove, not as a primary method. And skip the viral ‘silicone tube roller’ unless you already own one; it works, but a knife smash is faster and free.
Reference: Serious Eats on garlic science and prep.
Reference: UC Davis garlic handling guidance.
Garlic Prep Tips Beyond Peeling
Once it’s peeled, get the most out of it:
- Crush or mince garlic 10 minutes before cooking. Resting lets allicin (the main flavor compound) fully develop.
- For mellow garlic flavor, slice instead of mincing — less cell damage means milder taste.
- For maximum punch in raw applications (dressings, aioli), grate on a microplane into a paste.
- Never burn garlic: it turns bitter in seconds. Add it after onions have softened, and keep the heat moderate.
- Roast whole heads for sweet, spreadable garlic — 400°F for 40 minutes in foil with olive oil.
- Store unpeeled heads at room temperature in a ventilated spot. Refrigeration causes sprouting.
- Freeze peeled cloves or minced garlic in oil in ice cube trays for instant recipe-ready portions.
What About Pre-Peeled Garlic and Gadgets?
Let’s address the jar of pre-peeled cloves and the tube of garlic paste. They’re fine — genuinely. Pre-peeled garlic loses some pungency over time and occasionally has an off note from the processing, but for a busy weeknight it’s miles better than garlic powder. Garlic presses divide cooks: they produce intense flavor (maximum cell damage) but waste some clove and are annoying to clean. My take: a press is worth it if you cook with garlic daily; otherwise the knife smash plus a mince is faster overall.
As for single-purpose garlic-peeling gadgets — the silicone tubes, the twist jars — they all work, but they all solve a problem the shake and smash methods already solve for free. Save your drawer space and your money. Two metal bowls you already own will peel a whole head in 20 seconds flat.
Quick Answers to Common Questions
Is pre-peeled garlic from a jar okay to use?
It’s fine — genuinely. Jarred peeled garlic loses some pungency and can have a slight off note from processing, but for busy weeknights it’s miles better than garlic powder. Keep it refrigerated and use within the date. The garlic snobs will never know, and dinner will still be delicious.
Why does my garlic turn blue or green sometimes?
It’s a harmless chemical reaction — sulfur compounds in garlic reacting with acids (like lemon juice or vinegar) can create blue or green pigments. It’s completely safe to eat; the color is startling but the flavor is unchanged. Young garlic and certain varieties do it more. Your pickles aren’t haunted.
How long does peeled garlic last?
Peeled cloves keep about a week refrigerated in an airtight container. For longer storage, freeze them — peeled cloves, minced garlic in oil frozen in ice cube trays, or whole heads. Frozen garlic is recipe-ready straight from the freezer. Never store garlic in oil at room temperature, though — that’s a botulism risk; refrigerate oil-packed garlic and use within a week.
More from Daily USA Post
- Keep reading: what are the easiest freezer meals for new parents
- Related: how can I reduce food waste in my kitchen
- how much does it cost to go to a concert these days, explained in detail
The easiest way to peel garlic quickly is the shake method for bulk (two bowls, 20 seconds of vigorous shaking) and the knife smash for a few cloves — both faster and more reliable than any gadget. Microwave 10 seconds as a rescue move for stubborn skins. Master the smash and you’ll never dread a recipe that starts with ‘6 cloves of garlic, minced’ again.


2 Comments