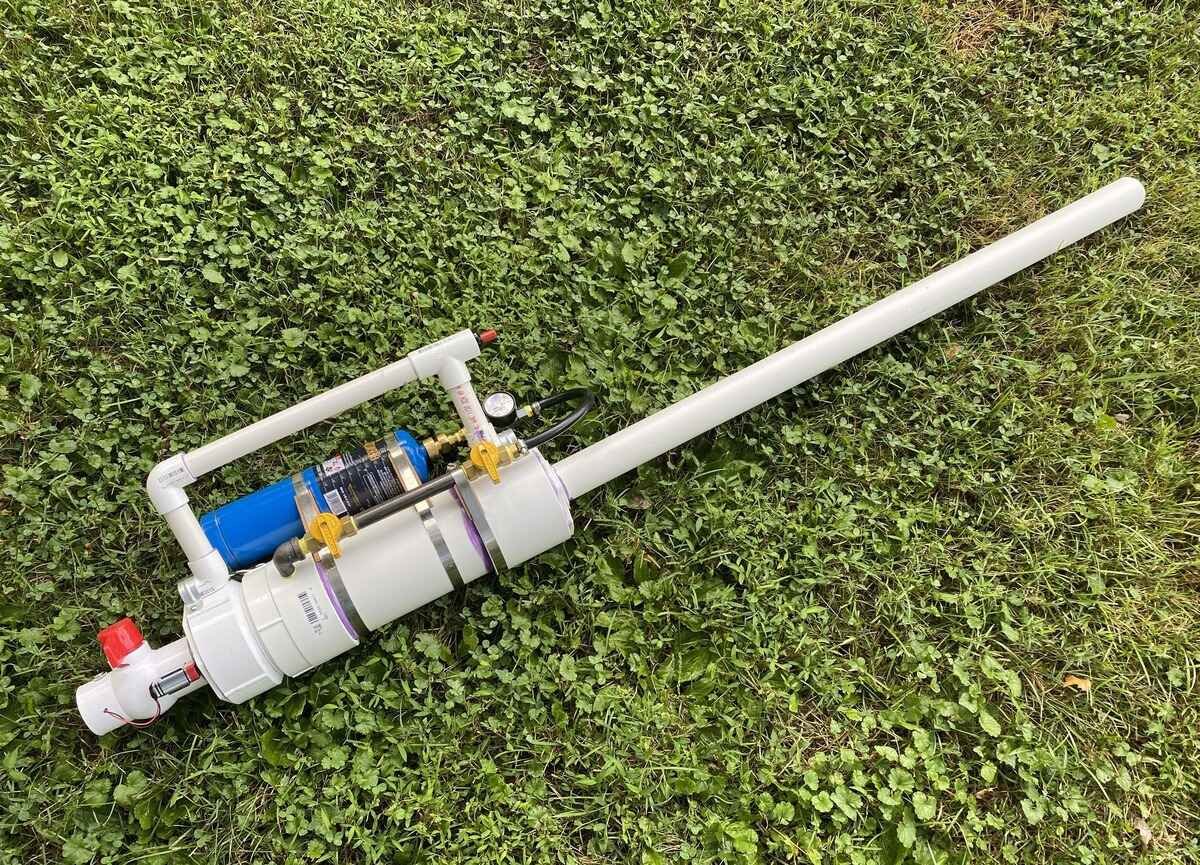
For about $25 to $40 in hardware-store parts you can build a device that throws a potato several hundred feet. That sentence should make you pause, not rush to the store. A potato cannon is a pressure device that uses a small combustion event to fire a hard projectile at speed. Built carelessly or used carelessly, it can injure people, break windows, and shatter its own pipe. So the build below starts where it has to start — with safety and the law — and the steps only follow once those are settled.
Safety first, before any cutting
Treat a potato cannon with the same caution you would give any tool that stores pressure and fires a projectile. Never point it at a person, an animal, a building, a road, or anything you would not be willing to see damaged. A potato leaving the barrel can travel fast enough to break skin and crack glass. Wear safety glasses for every build session and every firing session.
Use only wide, open ground with a clear field downrange and nothing beyond it that a stray shot could reach. Potatoes carry farther than most first-time builders expect, especially with a tailwind. Adults build and fire. Children, if present at all, watch from well behind.
Inspect the cannon before every use. Look for cracks, white stress marks, loose joints, or a chamber that smells strongly of old fuel residue. Do not fire a damaged cannon to see if it still works. Never look down the barrel, loaded or not, and keep hands clear of the muzzle when loading.
Temperature matters for PVC. Below about 60 degrees Fahrenheit, PVC gets more brittle and less forgiving under pressure. Cold-weather firing raises the risk of a split or shatter. If the day is near that mark, leave the cannon in the garage.
Legality: check before you build
Rules for combustion spud guns vary by state, county, and city. Some places treat them as firearms or destructive devices. Some ban them outright. Others restrict where any projectile device can be fired, even on private land near neighbors or roads. Federal treatment of a basic spud gun does not settle your local rule. Your local rule is the one that will be enforced where you stand.
Before you buy parts, check the law where you live and where you plan to fire. A short call to a local law enforcement non-emergency line is a normal, sensible step. Ask plainly what the rule is for a combustion potato cannon. If the answer is no, stop there. The same research habit applies to other gray-area projects — for example, what is and is not legal with N64 ROMs and emulation also turns on reading the actual rule for your situation rather than assuming a forum answer settles it. Laws are not a footnote to a build. They are the gate in front of it.
How it works, in plain terms
The physics takes about 30 seconds to understand. You load a potato so it seals the barrel. You introduce a small amount of flammable aerosol into a sealed chamber behind it, then add a spark. The fuel-air mix ignites, the gas heats and expands fast, pressure rises, and the expanding gas has only one path out — down the barrel, pushing the potato ahead of it. The potato leaves, the pressure vents, and the cycle ends.
That chain explains the safety rules. You are containing rapid gas expansion in plastic pipe, so the pipe must be rated for pressure, the joints fully bonded, and the fuel charge small — too much fuel pushes oxygen out and the mix will not ignite well. If any part of that chain is weak, the build is not ready.
Materials and tools
Gather everything before you start, so you are not improvising mid-build.
- Pressure-rated Schedule 40 PVC pipe, 3 to 4 inches in diameter, about 2 feet, for the combustion chamber. Never substitute thin-wall drain pipe, which is not made for this pressure.
- Pressure-rated PVC pipe, 1.5 to 2 inches in diameter, about 3 to 4 feet, for the barrel.
- A reducer coupling to join the wide chamber to the narrow barrel, and a threaded cleanout adapter with a matching plug for the back of the chamber.
- Purple PVC primer and PVC cement made for pressure pipe. This bonded joint is structural. Do not substitute tape, hot glue, or general adhesive.
- A piezoelectric grill igniter, the click-button type, long enough to mount through the chamber wall with its electrodes inside.
- Flammable aerosol fuel sold for this kind of use, such as a hairspray whose label lists flammable propellants. You will use only a short 1 to 2 second burst per shot, as directed below.
- Potatoes sized to fit the barrel snugly, plus a wooden dowel or broom handle for seating them.
- Tools: hacksaw or PVC cutter, measuring tape, marker, drill with a bit sized for the igniter, file or sandpaper for deburring, and safety glasses.
Total parts cost is roughly $25 to $40, plus potatoes. If a store cannot confirm a pipe is pressure-rated, do not buy it for a chamber. Good build guides, including Instructables’ hands-on build project guides, repeat the same point for a reason: material choice is not the place to save a few dollars.
Step 1: Cut the pipe to size
Measure and mark the chamber at 12 to 18 inches from the 3 to 4 inch pipe, and the barrel at 3 to 4 feet from the 1.5 to 2 inch pipe. Cut squarely. File or sand every cut edge smooth and free of burrs. Clean, square edges are what primer and cement need to bond.
Step 2: Dry-fit the whole cannon
Assemble every piece with no cement: chamber, reducer, barrel, and the cleanout adapter at the rear of the chamber. Check that the barrel sits straight, the reducer seats fully, and the plug threads on and off cleanly by hand. Mark each joint with a pencil line across the pipe and fitting so you can line the parts up fast once cement is on. Cement gives you seconds to position a joint, so this rehearsal matters.
Step 3: Prime and cement every joint
Work outdoors or in a well-ventilated space, away from any ignition source, because primer and cement vapors are flammable. For each joint, apply primer to the outside end of the pipe and the inside of the fitting, then apply cement to both surfaces, push the parts together with a slight quarter turn, align your marks, and hold firmly for about 30 seconds. Move to the next joint and repeat. Do not skip primer. Do not rush the hold. A joint that slips or is only partly seated is a weak point under pressure.
When all joints are done, stop. Let the cement cure fully for at least 24 hours before any firing test. Full cure is not a suggestion. Fresh cement joints can look solid hours before they have reached full strength. Write the time you finished on a piece of tape on the chamber so no one guesses.
Step 4: Fit the igniter
Drill a hole in the chamber wall near the rear, sized for your grill igniter, following the igniter maker’s instructions. Mount it so the electrodes sit inside the chamber with a small, clear spark gap and the button stays outside where your thumb can reach it without crossing the muzzle. Seal around the mount as the instructions direct, without blocking the electrodes. Click the igniter several times in a dim space and confirm you can see a consistent spark inside the chamber. If the spark is weak or erratic, fix it now, while the chamber is empty and open — not later, with fuel inside.
Step 5: Shape the muzzle to core the potato
File the inside edge of the barrel muzzle into a smooth bevel. This rim cores a potato to size: press and twist the potato against it and the barrel cuts a plug that fits the bore tightly. Keep the edge even, and handle it with care. A tight seal lets pressure build instead of leaking past the potato.
Firing routine, kept conservative
Fire only where your earlier checks allow it, in a large open area, with glasses on and everyone behind you. Load first: core the potato on the muzzle, then push it down the barrel with the dowel until it sits just ahead of the chamber. Keep your hand and face clear of the muzzle at all times. Open the rear plug, add one short burst of fuel — 1 to 2 seconds is the standard charge; more does not mean more power — and close the plug at once, firmly, so vapor does not escape and the chamber seals.
Hold the cannon at your side or under your arm with the muzzle pointed downrange and nothing beyond the target area. Never brace it in a way that puts your body over the chamber or your face near the rear plug. Click the igniter. After the shot, open the chamber and let fresh air clear the exhaust before reloading. Stale exhaust makes the next shot unreliable.
When it does not fire
A click with no ignition most often means the mix is wrong — usually too much fuel and too little oxygen — or the spark is weak. Do not look into the chamber or down the barrel. Keep the muzzle downrange, wait, vent the chamber fully in a safe direction, then check the igniter gap and try again with a shorter fuel burst. Weak shots usually point to a poor potato seal or a leaking joint. Re-core a fresh potato for a tighter fit. If you suspect a joint leak or see any crack, stop for the day and retire or rebuild that section before firing again. Inconsistent firing often means residue in the chamber. Let it cool and clear fully, wipe it clean, and start fresh. Troubleshooting never justifies pointing the muzzle at anyone to inspect it.
Sensible next steps and storage
Once the basic build works, treat any upgrade — metered fuel, better mixing, a larger chamber — as a new safety review, not a casual add-on. Do not chase range with unrated parts or larger charges.
Store the cannon empty, vented, and dry, with the rear plug loose, away from fuel cans and heat sources, and out of reach of children. Store fuel separately under its own label directions. Before the next session, repeat the inspection from the top. Its safety depends on simple habits repeated without exception — rated pipe, cured joints, a small charge, a clear field, and the willingness to not fire when any one is missing.