I recaulked our bathtub three times in four years before I learned I was using the wrong product and the wrong technique. The fourth time, with the right caulk and thirty extra minutes of prep, has held for five years and counting. Bathtub caulk fails from the preparation, not the product, but the product still matters.
What is the best caulk for sealing a bathtub? One hundred percent silicone, mold-resistant, specifically labeled for kitchen and bath. Here is the full story.
What Is the Best Caulk for Sealing a Bathtub?
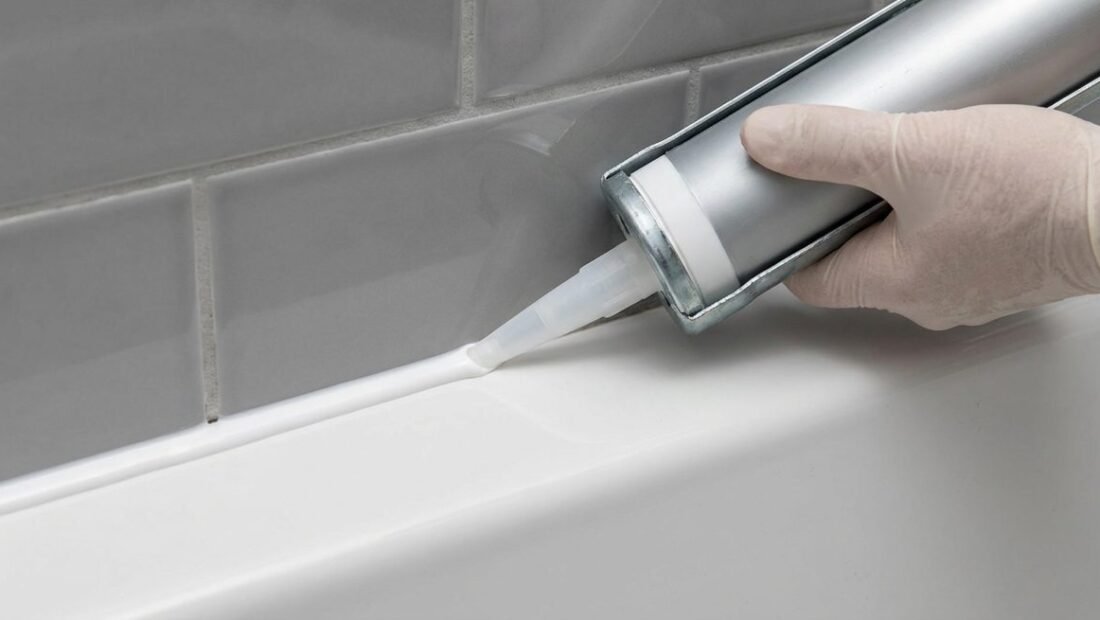
Silicone is the answer for tubs, full stop. It stays flexible forever (tubs flex and shift with weight and temperature), it is waterproof rather than water-resistant, and quality silicone caulks include mildewcides that resist the black spotting that kills lesser caulks. The downside is real: silicone cannot be painted and is miserable to remove, which is why proper application matters so much. Look for 100% silicone labeled for kitchen and bath use; the $8 to $12 tube outperforms the $4 tube by years.
What about siliconized acrylic latex? It is easier to apply, cleans up with water, and paints beautifully, which is why it is popular. But it is less flexible, less waterproof, and fails faster in the wet, flexing environment of a tub joint. Use it for trim and dry areas; use silicone where water lives. What is the best caulk for sealing a bathtub that gets daily use? Silicone, applied once, applied right.
- Use 100% silicone, kitchen-and-bath rated. Flexible forever, waterproof, mold-resistant. $8-$12 a tube.
- Remove ALL old caulk first. New caulk does not bond to old caulk. Plastic razor tools plus caulk remover for residue.
- Clean with denatured alcohol. After removal, wipe the joint with alcohol. Silicone bonds to clean surfaces only.
- Fill the tub with water before caulking. The tub’s weight opens the joint to its widest. Caulk the loaded gap so it never stretches.
- Tape both sides of the joint. Painter’s tape gives crisp lines. Remove tape immediately after tooling.
- Tool the bead with a wet finger or tool. One smooth pass. Do not overwork it; silicone skins fast.
- Let it cure fully. 24 hours minimum before water exposure. 48 is better. Patience is the final ingredient.
- Cut the tube tip small. A small opening gives control. You can always cut bigger; you cannot cut smaller.
The technique that changed everything for me: fill the tub with water first. A tub full of water plus a person weighs hundreds of pounds, pulling the tub down and opening the wall joint to its maximum. Caulk that gap, let it cure, and the caulk is never stretched in service; it only compresses. Caulking an empty tub means the first bath stretches the fresh caulk, which is why so many DIY jobs crack within months.
Removing Old Caulk Without Losing Your Mind
Old silicone removal is the worst part of the job, and there is no magic shortcut, only method. Score along both edges with a utility knife or plastic razor, pull up the bulk with pliers or a caulk removal tool, then attack residue with a silicone caulk remover gel (apply, wait per instructions, scrape). Finish with denatured alcohol on a rag. The joint must be completely clean and dry; new silicone over old residue fails on schedule. Budget more time for removal than for application; that ratio is normal.
While the caulk is out, inspect. Soft drywall, discolored backing, or a musty smell means water got behind the old caulk, and you should address that before recaulking. Caulk is a seal, not a structural repair.
Quick Answers to Common Questions
How long does bathtub caulk last?
Quality silicone applied properly lasts 5-10 years. Cheap acrylic or poor prep fails in 1-2 years. The prep work determines the lifespan more than the price tag.
Can I caulk over old caulk?
No. New caulk does not bond reliably to old caulk, and the result fails quickly. Remove everything down to the clean joint every time.
Why does my tub caulk keep molding?
Usually inadequate ventilation keeping the joint constantly damp, or non-mold-resistant caulk. Improve exhaust fan use and use kitchen-and-bath silicone with mildewcide.
Should I caulk between the tub and floor?
Generally no; that joint needs to allow for movement and inspection. Caulk the tub-to-wall joints and leave the floor joint to a different solution if needed.
My Tub Caulk Checklist
- Buy 100% silicone, bath-rated. Mold-resistant. $8-$12. Worth it.
- Remove every trace of old caulk. Score, pull, gel remover, alcohol wipe.
- Fill the tub with water. Caulk the loaded joint. This is the pro secret.
- Tape, bead, tool, untape. One smooth pass. Remove tape immediately.
- Cure 24-48 hours dry. No showers. Patience completes the job.
What I Would Do Next
Five years on the current bead and it still looks new, which still surprises me given my history of annual recaulking. The difference was never the brand; it was the full removal, the alcohol wipe, the water-filled tub, and the 48-hour cure. Caulk rewards the patient and punishes the hurried, like most things in a house.
What is the best caulk for sealing a bathtub? One hundred percent silicone, mold-resistant, applied to a surgically clean joint with the tub full of water, and cured patiently.
Prep is the product. Do the prep, and the $10 tube lasts a decade.
A note on timing: the best time to recaulk is during dry weather with moderate temperatures, ideally spring or fall. Silicone cures best between 40 and 80 degrees with moderate humidity. Caulking in a steamy bathroom right after a shower traps moisture in the joint, so run the exhaust fan for an hour first and work with the room as dry as you can get it. The calendar matters less than the conditions, but conditions are easiest to control in mild seasons.
Related reading: What Are the Cheapest All-inclusive Resorts in the Caribbean.
Related reading: How Can I Prevent Ice Dams on My Roof in Winter.
Related reading: What Is the Cheapest Fence Option for a Backyard.
For official guidance, check out Family Handyman project walkthroughs and the Department of Energy home efficiency guides.