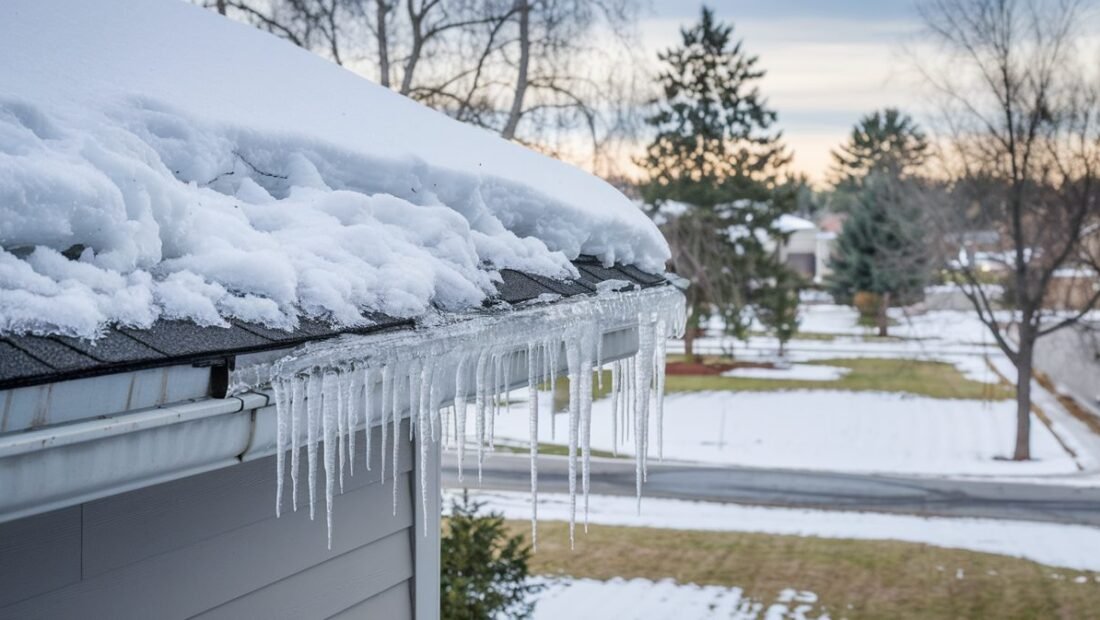
The winter we got ice dams, the icicles were beautiful and the water stains on the ceiling were not. Meltwater backed up under the shingles and into the house, and the repair cost $2,200. The prevention would have cost $150 in air sealing. Ice dams are a heat-loss problem wearing a winter costume, and they are almost entirely preventable.
How to prevent ice dams on your roof in winter comes down to one principle: keep the roof deck uniformly cold. Here is how.
How Can I Prevent Ice Dams on My Roof in Winter?
Understand the mechanism: heat escaping from your house warms the roof deck, melting the bottom layer of snow. Meltwater runs down to the colder eaves (which extend past the heated house), refreezes into a dam, and subsequent meltwater pools behind the dam and backs up under shingles. The icicles are the decoration; the pooled water forcing its way under shingles is the damage. Prevention means stopping the uneven melting, which means stopping heat loss into the attic.
The permanent fixes, in order of impact: air seal the attic floor (every pipe, wire, light fixture, and hatch sealed with caulk and foam; this is the single highest-impact ice dam prevention), insulate the attic to R-49+ (keeps heat in the house, keeps the roof deck cold), and ensure proper ventilation (soffit-to-ridge airflow carries away any residual heat and moisture). How can I prevent ice dams on my roof in winter for under $200? Air sealing supplies and a weekend: caulk, expanding foam, and weatherstripping on the attic hatch. This fixes most ice dam problems at the source.
- Air seal the attic floor. The #1 fix. Caulk and foam every penetration. Under $100.
- Insulate to R-49+. Keeps heat in, roof deck cold. The long-term solution.
- Verify soffit-to-ridge ventilation. Airflow carries away residual heat. Baffles keep vents clear.
- Seal and insulate the attic hatch. A giant uninsulated hole in your thermal envelope.
- Keep gutters clean. Clogged gutters trap meltwater that feeds dams.
- Use a roof rake after heavy snow. Remove the bottom 3-4 feet of snow. Prevents the raw material of dams.
- Heat cables: last resort. They melt channels, not causes. Useful for problem spots while you fix the attic.
- Never chop ice dams. Hacking damages shingles. Steam removal by pros is the safe emergency fix.
For immediate relief when dams have already formed: use a roof rake from the ground to remove snow from the lower roof (never climb onto an icy roof), fill a nylon stocking with calcium chloride ice melt and lay it perpendicular across the dam to melt a drainage channel (not rock salt, which damages shingles and plants), and for severe cases call a professional with a steam removal system ($400-$800). Chopping, hammering, or pressure-washing dams destroys shingles and is never worth it.
The Attic Fix in Detail
The attic work that prevents ice dams permanently: seal all penetrations in the attic floor with fire-rated caulk and expanding foam (plumbing stacks, electrical runs, recessed lights, the chimney chase, dropped soffits), weatherstrip and insulate the access hatch, add insulation to reach R-49, install rafter baffles to maintain soffit airflow, and verify ridge or roof vents are clear. Total DIY cost: $200-$600. This same work also cuts heating bills 10-25%, so the ice dam prevention is nearly free when counted against energy savings.
What does not work as a primary strategy: heat cables alone (they treat the symptom and fail in extreme cold), roof de-icing chemicals scattered randomly (environmental damage, shingle damage), and ignoring it (each winter’s dam forces more water under shingles, compounding damage year after year).
Quick Answers to Common Questions
What causes ice dams?
Heat escaping into the attic melts roof snow unevenly; meltwater refreezes at the cold eaves, forming a dam that traps subsequent meltwater under shingles. It is a heat-loss problem, not a roofing problem.
How do I get rid of an ice dam quickly?
Roof rake the snow off, lay calcium chloride in a stocking across the dam to melt a channel, or call a pro with steam equipment. Never chop or hammer; you will destroy shingles.
Will new shingles prevent ice dams?
No. Ice dams form from heat loss regardless of shingle age or type. Ice-and-water shield membrane under shingles (code in cold climates now) limits damage but does not prevent dams.
Are ice dams covered by insurance?
The resulting water damage often is, subject to your deductible and policy terms. The dam removal and the preventive attic work are maintenance, not covered. Check your specific policy.
My Ice Dam Prevention Checklist
- Air seal the attic floor. #1 fix. Caulk + foam, under $100.
- Insulate to R-49+. Cold roof deck = no uneven melting.
- Ventilate soffit to ridge. Carries away residual heat and moisture.
- Roof rake after heavy snow. Remove the raw material from the eaves.
- Calcium chloride for emergencies. Stocking method. Never rock salt, never chopping.
What I Would Do Next
Three winters since the attic sealing, and the eaves stay clean while neighbors’ houses grow icicle beards. The heating bills dropped too, which means the ice dam fix paid for itself twice over. The roof deck is cold, the snow stays put until it melts evenly, and the ceilings stay dry. Heat loss was the villain all along.
How to prevent ice dams on your roof in winter: air seal the attic, insulate deeply, ventilate properly, and rake heavy snow. Fix the heat loss and the dams never form.
The icicles are pretty. The dry ceiling is prettier. Seal the attic.
One often-overlooked contributor is the bathroom exhaust fan venting into the attic instead of outside, a depressingly common shortcut in older homes. Every shower pumps warm moist air directly onto the roof deck, melting snow from below and feeding both ice dams and mold. Rerouting the vent through the roof or a gable wall is a half-day job that solves two problems at once. While you are up there, check that recessed lights are IC-rated and sealed; old can lights are notorious heat leaks, each one a tiny chimney warming the deck above it.
For homes with chronic ice dams despite decent insulation, an energy audit with infrared imaging is worth the $200-$400. The camera reveals exactly where heat is escaping, often in surprising places like chase ways, dropped soffits, or the wall tops where insulation has settled. Targeted fixes based on real data beat generic advice every time, and many utilities subsidize the audit cost. Know your leaks before you seal them.
Related reading: What Should I Do If I Lose My Passport Abroad.
Related reading: How Much Does It Cost to Replace Old Windows.
Related reading: What Is the Best Paint Color for a Small Dark Living Room.
For official guidance, check out the Department of Energy home efficiency guides and Family Handyman project walkthroughs.