
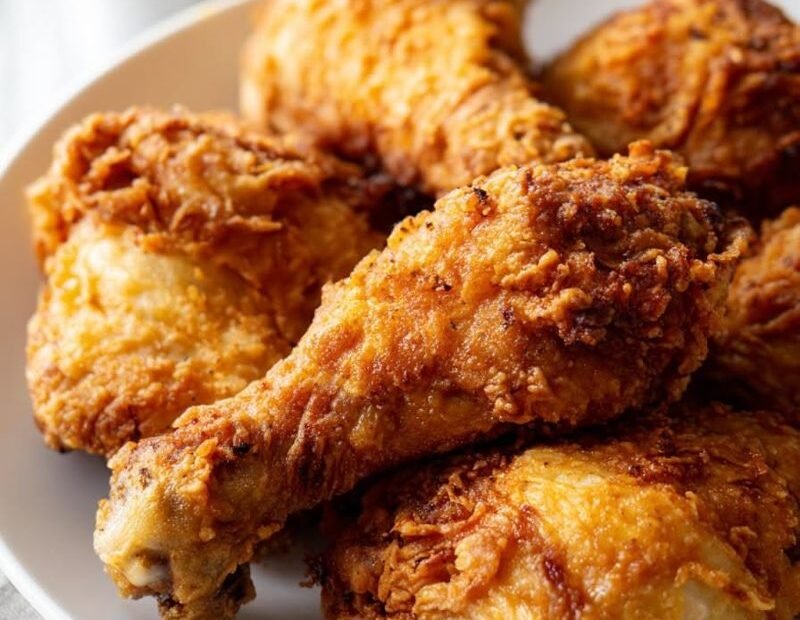
Every home cook who fries chicken knows the two failures. Either the breading slides off in the oil in a single soggy sheet, or the crust that crackled in the pan goes soft and steamy by the time it reaches the plate. Neither is bad luck. Crispiness is a system with about five moving parts — brine, surface moisture, coating rest, oil temperature, and the drain — and it fails whenever one part is skipped. Get all five right and the crunch is reliable enough to hear across the room. Here is the system, in the order the chicken experiences it.
What you need
- Bone-in, skin-on chicken pieces — thighs and drumsticks forgive beginners most
- Buttermilk, salt, and hot sauce if you like heat, for the brine
- Flour, seasoned well, plus cornstarch (up to a quarter of the flour) for a lighter, crisper crust
- A heavy skillet or Dutch oven, enough neutral oil for a shallow fry, and a thermometer
- A wire rack set over a sheet pan — not paper towels, for reasons below
Step 1: Brine in buttermilk, 4 to 24 hours
Submerge the pieces in buttermilk with a generous hand of salt (and hot sauce, which mostly seasons rather than heats) and refrigerate for at least 4 and up to 24 hours. The brine does three jobs at once: it seasons the meat to the bone, the acid gently tenderizes, and the buttermilk clinging to the surface becomes the glue the flour sticks to. This is not a step to compress into 20 minutes; the difference between a 1-hour soak and an overnight one is audible in the finished crust.
Step 2: Drain, warm up, and get the surface tacky
Pull the chicken from the brine about 30 minutes before frying and let it drain on a rack. Two things happen: the pieces lose their refrigerator chill, so they do not crash the oil temperature when they go in, and the surface dries from dripping to tacky. Tacky is the target. Flour clings to a tacky surface and forms a crust; on a dripping surface it forms a paste that lets go in the oil — failure number one, prevented at the draining rack.
Step 3: Dredge, then rest the coated chicken
Season the flour aggressively — it is the crust’s only seasoning — and blend in the cornstarch. Press each piece firmly into the flour, turning and packing it on, then set the coated pieces back on the rack for 15 to 20 minutes before any oil is heated. This rest is the step most recipes skip and the one that matters most: the flour hydrates against the tacky surface and sets into a coating that stays put through frying instead of floating off. A splash of brine flicked into the flour bowl beforehand creates the little craggy bits that fry up extra crisp, if you like that texture.
Between steps: the choices that quietly decide the result
The pieces. Bone-in, skin-on thighs and drumsticks are the forgiving cuts: dark meat stays juicy across a wide doneness window, and the bone slows the cooking enough for the crust to set before the interior overshoots. Breasts cook faster (8 to 10 minutes) and dry out the moment they are neglected, which is why they are the advanced section of a beginner recipe. Wings need less time and more turning. Whatever the mix, sort pieces by size and fry like with like, so a batch finishes together. The seasoning architecture. Flavor lives in three layers — the brine seasons the meat, the flour seasons the crust, and a final light salting seasons the surface — and a bland bird almost always skipped the first. Paprika in the flour is for color as much as taste; garlic powder, onion powder, black pepper, and a pinch of cayenne build the classic profile; a spoonful of the brine’s hot sauce in the brine itself contributes background warmth rather than heat. The oil. Choose a neutral oil with a high smoke point — peanut is the traditional frying oil for a reason — and use enough depth that pieces sit half to two-thirds submerged in a skillet (a shallow fry, turned once) or fully submerged in a Dutch oven. Oil that has fried several batches accumulates flour sediment that burns and spots the crust; strain it between large sessions, and never let the sediment story end with gray chicken.
Step 4: Fry at a held temperature, in batches
Heat the oil to about 350°F and, more importantly, keep it there. Crowding the pan drops the temperature and steams the crust instead of crisping it, so fry in batches with space between pieces. Bone-in dark meat takes 12 to 15 minutes, breasts 8 to 10, turned once. Color is a liar here; the only trustworthy finish line is internal temperature — 165°F at the thickest point, read on a thermometer rather than guessed from the juices. ThermoWorks’ guidance on instant-read thermometers and cooking temperatures is the reference worth bookmarking if you want that reading in two seconds instead of ten. For very thick pieces, there is a sanctioned cheat: fry to deep golden (about 8 minutes), then finish in a 350°F oven until the thermometer says 165°F. The crust stays crisp and the center catches up without burning.
Step 5: Drain on a rack, and serve like it matters
Lift the chicken onto the wire rack, never onto paper towels. Paper traps steam against the bottom crust and undoes the entire fry in five minutes; a rack lets air circulate so the crust stays crisp on every side. Rest a few minutes — the juices settle and the crust sets harder as it cools slightly. Salt lightly the moment it comes out of the oil, while the surface can still hold it. Leftovers, should any survive, follow the storage clock covered in the companion guide to how long cooked chicken lasts in the fridge — and reheating in a hot oven on a rack, never the microwave, is how day-two chicken keeps some of its crunch.
Holding and reheating: keeping batch two as crisp as batch one
Real frying happens in batches, which creates a holding problem: the first pieces must stay crisp while the last ones cook. The solution is a low oven — 200 to 250°F — with the finished chicken resting on its rack inside, door closed. The gentle heat keeps the crust dry and the meat hot without cooking it further, and pieces can hold well for 20 to 30 minutes, which is also how a cook fries for a table of eight without serving in shifts. What does not work is covering the chicken, tenting it in foil, or stacking it in a closed container: all three trap the steam that the rack exists to release, and the crust softens in minutes. Leftovers reheat by the same principle the next day — hot oven, rack, 10 to 15 minutes until the crust re-crackles and the center is hot. The microwave is fast and catastrophic in equal measure; it steams the crust from inside. And a note on the oil you are left with: cooled, strained frying oil can be reused two or three times for chicken if it never smoked and was never overheated, stored sealed away from light. Oil that has gone dark, foamy, or sharp-smelling has finished its service and should be discarded, not argued with — fresh oil is cheaper than a ruined batch of chicken.
One safety paragraph belongs in every frying guide, stated without drama: hot oil and water are enemies, which is why the chicken goes in drained and tacky rather than dripping (a second benefit of Step 2), why a wet utensil never enters the pan, and why the pot is filled no more than halfway — the oil rises when the chicken lands, and a boil-over onto a burner is the one genuinely dangerous event in this recipe. Keep a lid nearby that fits the pan; smothering is how an oil fire ends, and water is never how it ends. Children and pets get a boundary line at the kitchen’s edge during frying, drawn in advance rather than negotiated mid-sizzle. None of this makes the recipe hazardous — it is a century-old everyday technique — but crisp chicken is not improved by sirens, and the calm cook who sets the station up safely is the same one whose crust comes out even.
The troubleshooting table, in one paragraph
Breading fell off: the chicken went into the flour too wet, or the coated pieces never got their 15-minute rest. Crust went soggy: the pan was crowded, the oil sagged below temperature, or the chicken drained on paper. Crust burned while the center stayed raw: the oil ran too hot, or the pieces came straight from the fridge. Meat was bland under a great crust: the flour was under-seasoned or the brine was rushed. Every one of those failures points at a specific step above — which is the good news. The system is short, and once it runs in order, crispy stops being an achievement and becomes the default.


2 Comments