Wallpaper removal punishes the impatient in a specific currency: every shortcut taken in the morning is repaid as drywall repair in the evening. The job itself is not skilled so much as sequenced — soften, peel, wash, dry, judge — and it fails when the sequence is rushed, because dry paper does not release, it tears, and its backing stays behind to be fought separately. Treat the project as a timeline rather than a task: a preparation phase, a wet phase worked in small sections, a cleanup phase that nobody budgets for, and a final judgment about what the wall underneath can honestly become. Here is the timeline as it actually unfolds in a typical room.
Phase 0 (the evening before): test a corner and read the wall
Everything depends on two unknowns: how many layers are up there, and what the wall under them was finished with. Find an inconspicuous corner — behind a door, inside a closet edge — lift a seam with a utility knife, and peel slowly. One layer over painted drywall is the friendly job. Multiple layers, or paper applied directly to unprimed drywall (the nightmare configuration of certain decades), changes the plan and the budget, because the paper’s adhesive has bonded to the drywall’s paper face itself, and removing one removes the other. Also test whether the top layer is peelable vinyl — many modern papers are strippable, with a face that pulls away dry, leaving only the backing to soften. Ten minutes of reconnaissance decides whether this is a one-day project, a steamer-rental project, or the rare case for calling in a professional remover at roughly $300 to $600 per room before a wall gets gouged past easy repair.
Phase 1 (first hour): protect the room and score the paper
Strip the room down: furniture out or centered and sheeted, outlet covers off, baseboards taped, and drop cloths — ideally plastic under cloth — across the floor, because the process generates a surprising volume of wet, glue-slimed debris that sticks to everything it lands on. Then score the wallpaper’s surface with a scoring tool (the Paper Tiger style, with rolling teeth) using light, circular pressure. The perforations let water and steam reach the adhesive. The pressure is the skill: score through the paper, not into the wall. Every gouge carved now becomes a repair later, and heavy-handed scoring is the single most common self-inflicted wound in the whole project. Work wall by wall rather than room-wide, so each scored section is softened and stripped before it dries and re-bonds.
Phase 2 (the long middle): soften in sections and peel with patience
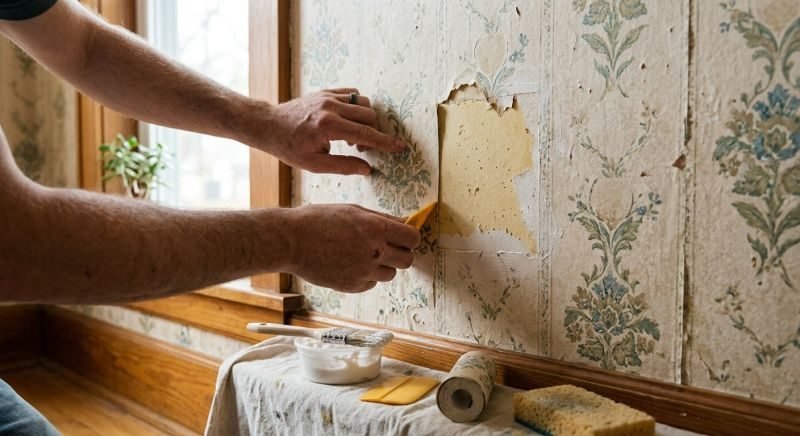
The working rhythm is a loop, and it cannot be parallelized: wet a section of about three feet, wait for the adhesive to let go, peel, move on. Two wetting systems compete. A rented wallpaper steamer (about $50 a day) drives steam through the perforations and softens adhesive faster and more evenly than anything else — for whole rooms and multiple layers, the rental pays for itself in saved hours. The alternative is hot water with a sponge or a garden sprayer, with a little wallpaper-removal solution or a splash of fabric softener mixed in, applied and re-applied; it works fully well on single layers over sound paint, at the price of more passes. Either way, the paper tells you when it is ready: it darkens, bubbles slightly, and releases in sheets under a wide putty knife held at a low angle. Young adhesive lets go in long satisfying ribbons; paper that comes off in confetti is paper being forced — re-wet it and wait. The backing layer, if the face peeled dry, softens faster but must all come off: paint over leftover backing and the new finish blisters as the glue re-wets.
Phase 3 (the underestimated hour): wash the glue off the wall
When the paper is down, the wall is not clean — it is coated in old adhesive, invisible when dry and catastrophic under paint, where it crackles, lifts and shows through as a crackled texture for the life of the room. Wash the walls with hot water and a sponge, changing the water repeatedly, until a palm dragged across the dry wall feels like clean plaster rather than faintly tacky. This phase is skipped or rushed in almost every bad outcome story, because it arrives when the worker feels finished. Budget it as a full phase of the timeline, run your hand over every square foot as the inspection, and let the wall dry completely afterward — overnight, not an hour — before judging or coating anything.
Phase 4 (next day): judge the wall, repair, and prime correctly
Now the wall gives its honest report. Minor nicks and lifted drywall paper get skimmed with joint compound, sanded, and — the step that separates durable results — sealed with a primer designed to lock down problem surfaces (a shellac or dedicated problem-surface primer over any torn drywall paper, because water-based paint re-wets torn paper and bubbles it). Larger damage, or a wall that came away with its face attached to the paper, graduates to a full skim coat, which is also the legitimate plan B for a whole room in the nightmare configuration: stop peeling, stabilize, skim, sand, prime. When the wall passes judgment, it is finally ready to become something else — and the reward for the patience is that the color decision can now be made on a clean slate, which is exactly the moment to think through the best paint color for a small dark living room if the room in question is small or dark, because bare-wall day is the only day the light can be assessed honestly.
The stubborn patches every room has
Even a cooperative wall keeps a few strongholds, and knowing their counters in advance saves the project’s morale. Behind radiators and around pipes, paper survives because the steamer plate cannot sit flat; a spray bottle of hot water, a soaked towel held in place, and a narrow scraper work the area in small bites. Inside corners and along the ceiling line, strips were often overlapped and double-glued; score those runs a second time and give them double the soaking. The patch behind where a picture or mirror hung for twenty years releases differently from its sun-faded surroundings and sometimes brings paint with it — accept the small repair rather than escalating force against the whole wall. And the final square foot of any room, usually behind the door, is where patience runs out and gouges happen; the professional trick is to stop for the day before that square foot, because tired hands with a rigid scraper are how a clean project earns its one bad scar.
The tool list, ranked by what earns its keep
Strip away the specialty catalogues and the job needs eight things: a scoring tool, a wide (4-to-6-inch) flexible putty knife for peeling, a rigid scraper reserved for glue residue rather than paper, a spray bottle and a bucket sponge for wetting, plastic sheeting and cloth drops, a utility knife with spare blades for seams and corners, a steamer if the room or layers justify the $50 rental, and joint compound with a sanding sponge waiting in Phase 4. The wide knife matters more than its price suggests — a narrow blade concentrates force and digs; a wide one spreads it and planes under the softened sheet. Keep two buckets of hot water in rotation during the wash phase so one is always clean. Total purchased consumables for a one-layer room commonly land under $40 plus the optional steamer, which is precisely why labor, not supplies, is the currency this whole project trades in — and why the deliberate timeline, rather than any tool, is what gets a wall safely from paper to paint-ready.
A note on the room’s contents and the people in it: the debris of this job is wet, adhesive and endless, and it migrates on shoes. Set a single path from workroom to bin, lined with the oldest sheet you own, and keep pets out until floors are washed — paws print glue across a house with impressive efficiency. Small children and steamer work also mix badly; schedule the wet phases when the house is empty if you can. These logistics never appear on the product labels, and they are the difference between a project that stays in one room and one the whole household remembers.
When to stop mid-timeline and change strategy
A timeline is also a set of decision points, and two findings justify abandoning the peel. The first is paper bonded to bare drywall across the whole room, diagnosed in Phase 0: the labor difference between removal and skim-coating inverts, and skim-coating becomes the professional answer. The second is suspected old lead paint or asbestos-era materials in the wall assembly itself — unlikely in paper, possible in old skim and patch layers — where stopping and testing is the only correct move. For supply runs, technique references and tool choices mid-project, Family Handyman’s wall and painting project guides maintain the standard walkthroughs for each phase. But for the ordinary room — one or two layers over painted plaster or drywall — the timeline above is the whole secret: recon, protect, score lightly, soften in sections, wash like you mean it, and let patience do what force cannot. Wallpaper removal is 10 percent technique and 90 percent timing, and the wall always collects its debt from the hurried.