
Garlic is the perfect beginner crop: nearly indestructible, planted in fall, ignored all winter, and harvested in late spring as bulbs that taste dramatically better than anything from a grocery store. In Texas, garlic thrives — the mild winters are actually ideal, since garlic needs cold exposure to form bulbs properly. Whether you have a raised bed, a few pots on a patio, or a corner of the yard, this step-by-step guide takes you from clove to harvest.
Step 1: Choose the Right Garlic for Texas
Not all garlic suits Texas. The state spans USDA zones 6–10, and variety choice matters. Softneck varieties (like ‘California Early’ or ‘Inchelium Red’) are the reliable choice for most of Texas — they tolerate mild winters, store for 6–9 months, and braid beautifully. Hardneck varieties (like ‘Music’ or ‘German Extra Hardy’) produce scapes (delicious curled flower stalks) and bigger cloves but need more winter chill — they perform best in North Texas and the Panhandle. Elephant garlic (actually a leek relative) grows enormous mild bulbs anywhere in Texas and impresses everyone.
Buy seed garlic from a garden supplier, not grocery store bulbs — grocery garlic may carry disease, be treated with sprout inhibitors, and is often a variety unsuited to your climate. Texas A&M AgriLife Extension’s gardening resources include variety guidance tuned to Texas zones.
Step 2: Time Your Planting
Garlic goes in the ground in fall — and timing is everything. Plant 4–6 weeks before your area’s first hard freeze so cloves establish roots before winter but don’t sprout excessively. Rough Texas guide: North Texas/Panhandle: early-to-mid October. Central Texas (Austin/San Antonio): late October to mid-November. South Texas/Houston: November into early December. Too early and you get weak fall top-growth vulnerable to freeze; too late and roots don’t establish before the cold. When in doubt, slightly early beats slightly late.
Step 3: Prepare the Bed
Garlic demands full sun (6+ hours) and well-draining soil — soggy winter soil rots bulbs, the number-one Texas killer in clay-heavy areas. Work 2–3 inches of compost into the top 6–8 inches of soil; garlic is a moderate feeder that appreciates the organic matter. Aim for slightly acidic to neutral pH (6.0–7.0). In heavy clay, plant in raised beds or mounds 6–8 inches high — drainage insurance that pays off every wet winter. For general bed-planning help, our guide to planning your garden by location covers matching crops to your specific Texas conditions.
Step 4: Plant the Cloves
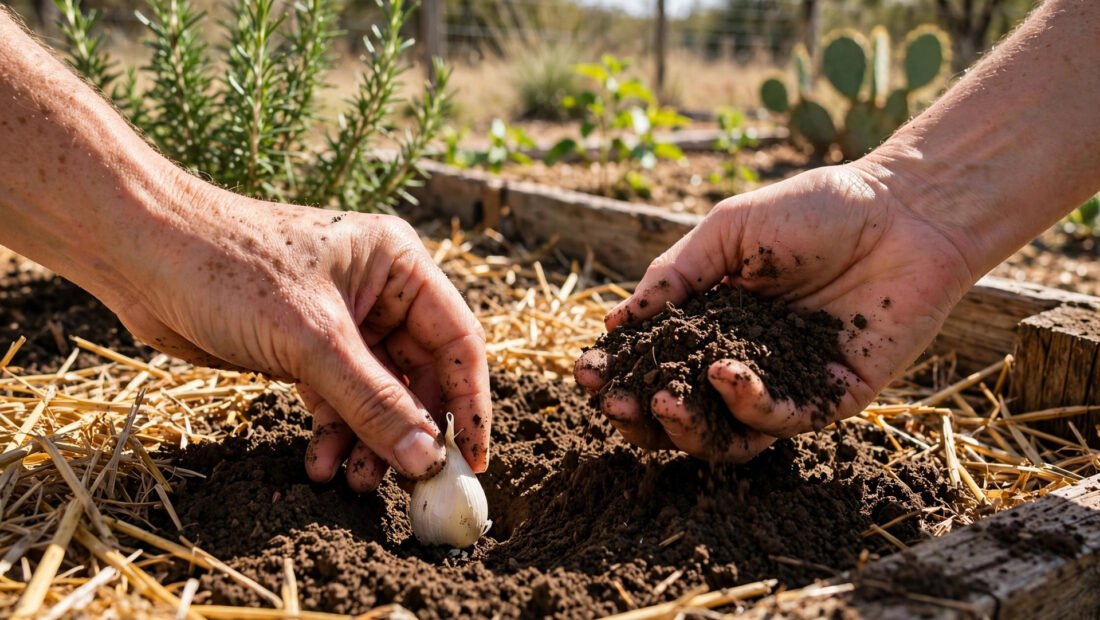
Break bulbs into individual cloves the day of planting (not earlier — exposed cloves dry out). Plant only the largest, healthiest cloves — big cloves grow big bulbs; small cloves grow small bulbs. It’s that simple. Push each clove pointy-end up, 2 inches deep, 6 inches apart, in rows 8–12 inches apart. Mulch heavily — 4–6 inches of straw or shredded leaves — which insulates against temperature swings, retains moisture, and suppresses winter weeds. Water thoroughly after planting, then back off: fall-planted garlic needs surprisingly little water until spring growth begins.
Step 5: Winter and Spring Care
Here’s the beautiful part: mostly, you do nothing. Garlic overwinters quietly, using the cold to trigger bulbing (this is called vernalization — without sufficient chill hours, bulbs don’t divide properly, which is why variety selection for your zone matters). In spring, when green shoots emerge vigorously: water consistently (about 1 inch per week if rain doesn’t provide it), side-dress with a balanced fertilizer or compost tea once in early spring, and keep weeds pulled — garlic hates competition. If you planted hardneck varieties, harvest the scapes when they curl (usually May) — cutting them redirects energy to the bulb and gives you a gourmet ingredient for pesto and stir-fries.
Step 6: Know When to Harvest
Timing the harvest is the highest-stakes decision in garlic growing. Too early: small, underdeveloped bulbs. Too late: bulbs split open in the ground and won’t store. The signal: when the bottom 2–3 leaves have browned but 4–5 green leaves remain (those green leaves become the bulb’s protective wrappers — each wrapper is a leaf). In Texas, this is typically late May to June. Stop watering 1–2 weeks before harvest to toughen the wrappers. Loosen with a fork (don’t pull — you’ll tear the stem), and harvest on a dry day if possible.
Step 7: Cure and Store
Fresh garlic needs curing: hang or lay bulbs in a warm, dry, ventilated spot out of direct sun for 2–4 weeks until the necks are fully dry and papery. A Texas garage with airflow works perfectly (not the humid outdoors in June). After curing, trim roots and tops, and store softneck varieties at room temperature in a breathable container — properly cured softnecks keep 6–9 months. Don’t refrigerate (cold + humidity triggers sprouting); a cool pantry or closet is ideal. Save your biggest, best bulbs as next fall’s seed garlic — selecting for size year after year adapts the variety to your exact microclimate.
The Old Farmer’s Almanac garlic growing guide offers a good second reference with month-by-month checklists.
Troubleshooting Common Problems
Small bulbs: usually planted too late, harvested too early, or grown from small cloves — fix all three next season. Rotting in the ground: drainage failure; switch to raised beds. Yellowing leaves in spring: often nitrogen deficiency — side-dress with compost or balanced fertilizer. No bulb division (one big round): insufficient winter chill — switch to a lower-chill softneck variety. Pests: garlic is remarkably pest-free; the occasional onion maggot or nematode issue is usually solved by rotating planting location yearly (never plant garlic where onions or garlic grew the previous year).
And while your garlic does its thing outdoors, don’t neglect the indoor garden — our tips for keeping houseplants alive with a busy schedule keep your windowsill crew thriving through the same seasons.
Conclusion
Growing garlic at home in Texas is seven steps: pick softneck varieties suited to your zone, plant in fall 4–6 weeks before first freeze, prepare sunny well-draining soil, plant big cloves pointy-up under heavy mulch, let winter do its vernalization work with light spring care, harvest when 2–3 bottom leaves brown (late May–June), and cure before storing. Total active effort: a few hours across eight months. Reward: dozens of bulbs that make store garlic taste like a pale imitation — plus scapes, plus seed stock for next year. Plant this fall; thank yourself next summer.
Frequently Asked Questions
Can I grow garlic from grocery store cloves?
Technically yes, but it’s unreliable — grocery garlic may carry disease, have sprout inhibitors, or be a variety unsuited to Texas. Seed garlic from suppliers costs little and performs far better.
How much garlic does one clove produce?
One planted clove grows into one full bulb containing 6–12+ cloves (variety dependent). Plant 30 cloves in fall, harvest 30 bulbs in spring — the multiplication is the magic.
Does garlic need a lot of water?
Moderate: consistent moisture in spring during active growth (~1 inch/week), then dry conditions approaching harvest. Overwatering, especially in clay soil, causes rot.
Can I grow garlic in containers?
Yes — use pots at least 8–10 inches deep with drainage holes, quality potting mix, and the same spacing. Containers work well in South Texas where in-ground drainage is poor.
Why did my garlic grow as one solid bulb instead of cloves?
Insufficient winter chill (vernalization). The variety needed more cold hours than your Texas winter provided — switch to softneck varieties rated for your zone next season.
