
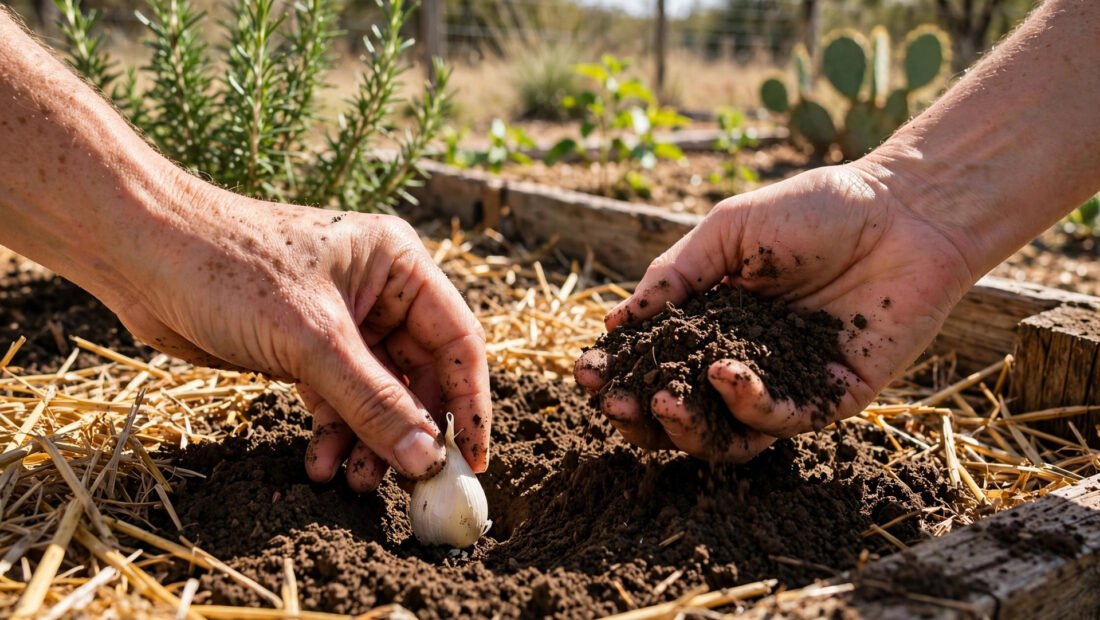
One garlic clove planted in October becomes a whole bulb by June, but only if the variety matches a Texas winter. Plant the wrong type and you harvest one round, clove-less bulb for eight months of waiting. Get the variety right and garlic is one of the easiest crops in a Texas garden: planted in fall, mostly ignored through winter, and lifted in late spring. Work through the seven steps below in order, starting well before planting day.
What You Need Before You Start
Gather a short list. You need seed garlic, sold by garden suppliers as bulbs for planting, compost, mulch such as straw or shredded leaves, a fork for lifting bulbs, and a sunny spot with drainage. A raised bed, an in-ground row, or a deep pot all work. Reserve the sunniest place you have: garlic wants full sun, at least six hours a day, and it sulks in shade. Keep the receipts simple. One clove produces one bulb, so the number of cloves you plant is the number of bulbs you will harvest, minus the odd failure.
Step 1: Choose a Variety That Fits a Texas Winter
Garlic needs a stretch of cold, called vernalization, to split into cloves. Too little chill and the plant makes a single round bulb with no divisions. That one fact drives the variety choice.
For most of Texas, choose softneck garlic. Named examples include ‘California Early’ and ‘Inchelium Red’. Softnecks tolerate mild winters, which suits central, south, and coastal Texas. They also store well, about six to nine months after curing, and their flexible stems braid easily for storage. Hardneck varieties need more chill than most of the state gets, so reserve them for the coldest parts of north Texas and the Panhandle, and even there expect mixed results in a warm winter.
Buy seed garlic rather than planting grocery-store bulbs. Store cloves can grow, but they may be treated to delay sprouting, may carry disease, and are often imported varieties bred for a different climate. Seed garlic from a supplier costs little more and starts clean and suited to the region. Order early in fall, because popular softneck varieties sell out.
Step 2: Plant in Fall, Four to Six Weeks Before the First Hard Freeze
Timing does two jobs. Planted in fall, a clove grows roots in cool soil before winter, then waits. In spring it grows fast, using the winter chill to form a proper bulb. Planted in spring, Texas garlic usually runs out of cool weather and stays small.
Count back four to six weeks from your area’s usual first hard freeze. For much of Texas that lands in October to November. North Texas plants earlier, south Texas later. Planting a little early is safer than a little late: early cloves may show a few inches of green before winter, which is fine, while late cloves may not root well before the cold arrives.
Step 3: Prepare the Bed for Sun and Drainage
Wet winter soil rots garlic, and heavy Texas clay holds water. Drainage is therefore the main job of bed preparation. Work 2 to 3 inches of compost into the top 6 to 8 inches of soil. Compost feeds the plants and loosens clay at the same time. Aim for soil that is roughly neutral to slightly acidic, and break up large clods so cloves sit in fine, crumbly soil.
In heavy clay, plant in raised beds or simple mounds 6 to 8 inches high. The extra height lets winter rain drain away from the bulbs instead of pooling around them. Skip fresh manure, which can burn roots and encourage rot. If last year’s bed grew onions, leeks, or garlic, choose a different spot this year. Rotating away from the onion family reduces soil disease. For regional planting dates and variety notes, check Texas A&M AgriLife Extension’s horticulture guidance before you commit a whole bed.
Step 4: Break the Bulbs Apart and Plant the Biggest Cloves
On planting day, not before, break each seed bulb into single cloves. Cloves separated too early dry out. Keep the papery skin on each clove. Then sort ruthlessly: plant only the biggest, firmest cloves and set the small ones aside for the kitchen. Big cloves grow big bulbs. Small cloves grow small bulbs. This sorting step, which takes five minutes, has more effect on harvest size than any fertilizer you will add later.
Push each clove into the soil pointy end up and flat root end down. Planting upside down forces the shoot to curve around and wastes the plant’s energy. Set the top of the clove about 2 inches below the surface. Space cloves 6 inches apart in rows 8 to 12 inches apart. That spacing gives each bulb room to swell without crowding its neighbours. Water the bed well once planting is done, so soil settles around every clove with no air pockets.
Containers follow the same rules. Use pots at least 8 to 10 inches deep with drainage holes, fill them with good potting mix rather than garden soil, and keep the same spacing across the surface. Pots dry out faster than beds, so check them more often in spring.
Step 5: Mulch Deeply, Then Leave Winter Alone
Cover the bed with 4 to 6 inches of straw or shredded leaves straight after planting. Mulch does three things: it insulates cloves against sharp temperature swings, it holds soil moisture steady, and it smothers winter weeds. Texas winters swing between warm spells and sudden freezes, and that mulch layer softens both extremes.
Through winter, do very little. If a long dry spell hits and the soil is dry several inches down, water lightly. Otherwise leave the bed alone. Green shoots appearing in a warm spell are normal and hardy. Do not pull the mulch back early. Wait until spring growth is steady, then you can thin the mulch slightly if it is matted thick over the shoots.
Step 6: Feed and Water Through Spring Growth
Spring is the working season. Garlic grows fast from March onward and needs steady moisture: about 1 inch of water per week, counting rainfall. Water deeply and less often rather than sprinkling a little daily, so roots grow downward. In a raised bed or pot, check with a finger pushed into the soil; if the top two inches are dry, water.
Feed once in early spring. Side-dress each row with a balanced fertilizer, following the label rate, or water with compost tea. Side-dressing means scattering the feed along the row, a few inches from the stems, then watering it in. Do not pile fertilizer against the plants. One feeding is enough for most home beds that started with compost.
Keep weeds pulled all spring. Garlic hates competition: its roots are shallow, its leaves are thin and cast little shade, and weeds steal the water and food meant for the bulbs. A ten-minute weeding each week beats a rescue mission in May. One more timing detail matters at the end of spring: stop watering one to two weeks before you expect to harvest. Dry soil in the final stretch helps the bulb wrappers tighten and store better.
Step 7: Harvest When the Bottom Leaves Brown, Then Cure
Harvest timing is the highest-stakes call of the season. Too early and the bulbs are small. Too late and the wrappers split, the cloves separate, and the bulbs will not keep. Read the leaves instead of the calendar. Harvest when the bottom two or three leaves have browned and died back, while several upper leaves are still green. Each green leaf corresponds to a wrapper layer protecting the bulb, so harvesting with some green left keeps the bulb wrapped and sound.
In most of Texas that moment falls in late May or June. Choose a dry day if you can. Loosen each bulb with a fork pushed into the soil beside it, then lift. Never yank garlic out by the stem; the stem tears and the bulb bruises. Brush off loose soil with your hand. Do not wash the bulbs.
Curing turns fresh garlic into storage garlic. Lay or hang the whole plants in a warm, dry, well-ventilated place out of direct sun for two to four weeks: a garage with airflow, a covered porch, or a shed. The necks should end up fully dry and papery and the wrappers crisp. Only then trim the roots and cut the stems, leaving about an inch of neck on each bulb. Store cured softnecks at room temperature in a breathable container such as a mesh bag or an open basket. Expect six to nine months of storage from a well-cured softneck crop.
Set aside your biggest, healthiest bulbs as next fall’s seed garlic, and the cycle improves year by year as the variety adapts to your soil. Expect a few setbacks in the first season: a round, clove-less bulb means the variety needed more chill, yellowing spring leaves usually mean the plants want food, and rotted bulbs point back to drainage. Fix one cause at a time next fall. A bed of garlic also leaves you with generous harvests some years, so knowing how to use up leftover vegetables before they spoil helps you enjoy the surplus along with the rest of the garden rather than wasting it.

1 Comment