
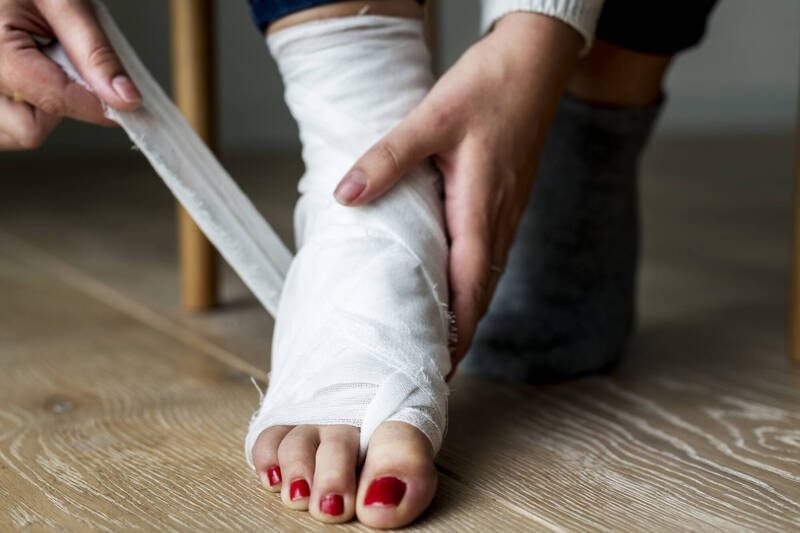
A wet kitchen floor, one wrong step, and your ankle rolls inward with a crunch you feel as much as hear. A twisted ankle at home is one of the most common injuries there is — and one of the most commonly mishandled, usually by doing too little in the first two days and too much of the wrong thing in the following week. What you do in the first 48 hours genuinely influences whether this is a one-week problem or a one-month problem. Here is the sequence, in order, from the first minute to the return to normal exercise.
What you need
An elastic compression bandage (or a snug sock and tape in a pinch), a bag of frozen peas or an ice pack with a thin towel as a barrier, two or three pillows for elevation, over-the-counter pain relief if you use it, and a chair or countertop to lean on for the first weight-bearing tests. Crutches help if you have them and cannot bear weight, but most home sprains do not need them. The AAOS guide to ankle sprains is the orthopedic reference for this injury and agrees with the sequence below.
Step 1: Get weight off it immediately — then test gently
Sit down where you are. In the first minutes, swelling starts and the joint is at its most vulnerable to a second twist, which is how a simple sprain becomes a bad one. Once you are seated and the first shock has passed (a few minutes), do the key test: put weight through the foot gradually, leaning on furniture. Being able to bear weight — even limping, even sore — is a reassuring sign that you are likely dealing with a sprain (stretched or torn ligaments) rather than a fracture. Being unable to bear any weight at all, even after resting, moves you toward the urgent care list in step 6. Wiggle the toes, check that the foot feels normally warm with normal color, and note where the pain actually lives: most home twists injure the ligaments on the outside of the ankle, below the outer ankle bone.
Step 2: Compress it
Wrap the elastic bandage from the toes upward past the ankle in a figure-eight, snug enough to support and limit swelling, never tight enough to cause numbness, tingling, or a foot that turns pale or cool — if any of those appear, rewrap looser. Compression is doing real mechanical work: it limits how much fluid pools in the injured tissue, and swelling is what turns a moderate sprain stiff and slow. Wear it during waking hours for the first two to three days, reapplying in the morning when swelling is at its lowest.
Step 3: Raise it above your heart
Prop the ankle on pillows so it sits above the level of your heart whenever you are resting, especially during the first 24 to 48 hours. Elevation is the most skipped step and the most quietly effective one, because gravity is the pump that drains swelling out of a foot — an ankle dangling at couch level swells; an ankle on three pillows drains. Combine steps 2 through 4 in the classic arrangement: wrapped, iced, and up on pillows, several times through the first day.
Step 4: Ice for pain — not for healing
Ice the ankle for about 15 minutes at a time, with a barrier between the pack and the skin, a few times on the first day or two. Be clear about what ice is doing: it is a pain reliever and it limits swelling. It does not speed up ligament healing, and marathon icing sessions may even work against recovery, since inflammation is part of how the body repairs tissue. So use ice the way you would use a painkiller — when it hurts, in sensible doses — and do not ice a numb ankle or fall asleep with the pack on. After about 48 hours, many people find warmth and movement feel better than cold; that instinct is in line with modern guidance, and MedlinePlus on ankle injuries covers the same first-days approach.
Step 5: Start moving it sooner than feels natural
Here is the step old advice got wrong: complete rest for a week or more slows recovery and stiffens the joint. Once the sharp pain eases — often at 24 to 48 hours — begin gentle weight-bearing as tolerated, walking short distances around the house with support nearby, letting pain be the governor (sore is acceptable, sharp or worsening is not). Add the rehab basics as soon as you can do them: ankle pumps, pointing and flexing the foot, tracing the alphabet with your toes to restore range of motion in every direction, and gentle towel stretches for the calf. When walking looks normal, add balance work — standing on the injured leg, holding a counter — because a sprain damages the joint’s position sense, and unretrained balance is the reason so many ankles roll again within the year. Mild sprains typically settle in one to two weeks; moderate ones take several weeks, and the balance work should outlast the pain by a good margin.
Step 6: Know the go-to-urgent-care signs
Home care has a firm boundary. Get seen the same day if: you cannot bear any weight after a day of rest; the ankle or foot looks deformed or the toes point in a wrong direction; there is numbness in the foot, or it turns pale, blue, or cold; the pain sits directly on the ankle bones themselves — on the bone rather than in the soft tissue in front of or below it — which raises the possibility of a fracture; the injury came with a snap followed immediately by major swelling; or swelling and pain keep worsening after 48 hours instead of plateauing. Those are the signs professionals use, too, when deciding about an X-ray — which answers the other common question: most straightforward sprains in people who can bear weight do not need one. If you do end up going in, it helps to know the terrain — how much an urgent care visit costs without insurance covers what to expect at the desk as well as in the exam room.
The first night, and what the morning should tell you
Sleep with the ankle propped on a pillow for the first night or two — overnight elevation is when elevation does its best work, because you are still for hours. Expect the morning to be informative: a straightforward sprain usually feels stiff but a shade better than the evening before, with bruising often arriving on day two or three as dark color that drifts down toward the foot. Bruising appearing and spreading is normal and not, by itself, alarming — it is blood from the injury finding its way out on schedule. What should concern you is the opposite trajectory: pain or swelling clearly worse on the second morning than the first, or new numbness. Keep the day’s plan calibrated to the morning report: better equals more gentle movement; worse equals another day of the full wrap-ice-elevate routine and a lower threshold for getting it looked at.
A realistic recovery timeline
People heal on spectrums, but the usual shape of a mild-to-moderate home sprain goes like this. Days one and two: swelling peaks, limping, the full first-aid routine. Days three to five: walking improves daily, bruising spreads and fades, alphabet exercises and ankle pumps restore most motion. Week two: near-normal walking, balance practice begins in earnest, easy cycling or pool walking if available. Weeks three to six: strength and balance rebuilt deliberately; running and sport reintroduced in the stages described next. Set expectations by the factor nobody likes: ligaments heal slower than pain fades, roughly twice as slow, so the calendar — not how the ankle feels on a good morning — should govern the jump back to full activity.
Step 7: Protect the return
The final phase is where most people re-injure themselves: the ankle feels fine at day 10, so it gets a full workout, a hike, or a pickup game — and rolls again, because strength and balance lag weeks behind the disappearance of pain. Return in stages: walking, then longer walks and easy cycling, then straight-line jogging, and only then cutting, pivoting, and sport. A lace-up brace or athletic tape for the first weeks back at activity is cheap insurance with real evidence behind it for people who have sprained before. Treat the second sprain as the one to prevent at all costs — each repeat stretches the ligaments further and makes the ankle sloppier, and “weak ankles” as a lifelong condition usually start as a first sprain that was rushed.
That is the whole arc: off it, wrapped, raised, iced sensibly, moving early, watched for the danger signs, and returned in stages. Do those in order and you have given a twisted ankle the best home treatment there is — the same treatment, in fact, that a clinic would prescribe for the great majority of these injuries.