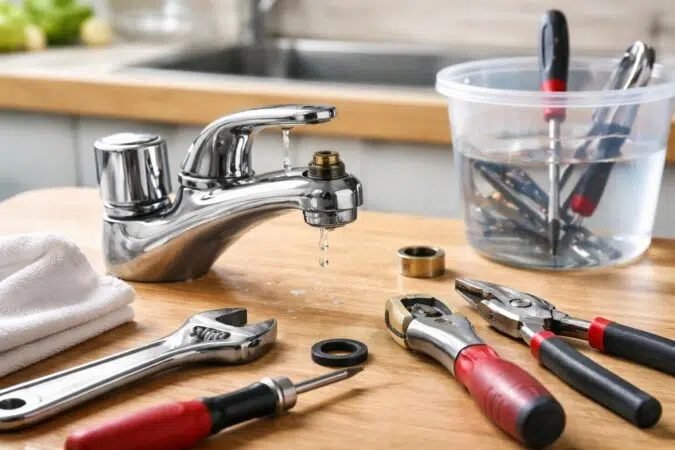
A leaky faucet drips about 3,000 gallons a year down the drain, which is both an environmental crime and money dripping out of your wallet one drop at a time. I ignored mine for two months out of pure intimidation, then fixed it in 25 minutes with a $6 part. The intimidation was the only hard part.
Here is how to fix a leaky faucet without calling a plumber, broken into steps simple enough that my past self, the one who was scared of it, could follow them.
How Do I Fix a Leaky Faucet Without Calling a Plumber?
First, identify your faucet type, because the fix differs. Compression faucets have separate hot and cold handles that you twist multiple turns; they leak when the rubber washer wears out. Ball, cartridge, and ceramic-disk faucets have a single handle; they leak when the cartridge, O-rings, or seals wear. Peek under the sink for a brand name, or take a phone photo of the faucet to the hardware store. The staff there identify faucet parts all day and will hand you the right $5 to $15 repair kit.
Now the actual repair. Shut off the water first, using the valves under the sink (turn clockwise), or the main house shutoff if there are no local valves. Open the faucet to release pressure and plug the drain with a rag so tiny parts cannot escape. Pry off the decorative cap on the handle, remove the handle screw, and lift the handle off. What you see next depends on type: for compression faucets, unscrew the packing nut and stem, then replace the washer and O-ring at the stem’s base. For cartridge faucets, pull the cartridge straight out (note its orientation) and drop in the identical replacement. Reassemble in reverse order, turn the water back on slowly, and check for leaks.
- Shut off the water before touching anything. Under-sink valves first, main shutoff as backup. Test that the water is off by opening the faucet.
- Plug the drain immediately. A rag or stopper saves every small screw from a watery grave. This step has saved more DIYers than any other.
- Take the old part to the store. Faucet parts are not universal. The worn washer or cartridge in your hand beats any description.
- Photograph each disassembly step. Your phone is your memory. One photo per layer makes reassembly foolproof.
- Do not overtighten. Snug is sealed; cranked is cracked. Overtightening splits washers and cracks ceramic disks.
- Replace O-rings while you are in there. They cost pennies and are the next thing to fail. Future you says thanks.
- Know when to stop. If the valve seat is deeply corroded, the faucet body is cracked, or shutoff valves will not budge, that is plumber territory. A $150 service call beats a flooded cabinet.
How do I fix a leaky faucet without calling a plumber when I cannot find the part? Take clear photos of the faucet, the removed stem or cartridge, and any brand markings to the hardware store’s plumbing aisle. If they cannot match it, the faucet may be old enough that replacing the whole unit ($50 to $150 for a decent one) is smarter than hunting extinct parts. A full faucet replacement is only slightly harder than a washer swap and often the better investment on a 20-year-old fixture.
What That Drip Is Costing You
A faucet dripping once per second wastes over 3,000 gallons a year. At average US water rates, that is $35 to $70 annually, plus the hot-water energy cost if it is the hot side dripping, which can double the waste. A $6 washer pays for itself in weeks. There is also the slow damage: constant moisture stains sinks, wears finishes, and in worst cases feeds mold in cabinets below. The drip is never just a drip.
While you are under the sink, look around. Water stains, musty smells, or soft particleboard are early warnings of bigger leaks. The faucet repair is the gateway inspection your plumbing has been waiting for.
Quick Answers to Common Questions
How long does a faucet repair take?
For a standard washer or cartridge swap, 20 to 45 minutes once you have the part. Add a hardware store trip for most first-timers, since identifying the part is half the job.
What tools do I need?
An adjustable wrench, a screwdriver, and plumber’s grease. Possibly Allen wrenches for set screws. That is genuinely the whole list for most repairs.
Why does my faucet still drip after replacing the washer?
Usually a corroded valve seat that the new washer cannot seal against. A valve seat wrench and a replacement seat cost a few dollars; if the seat is deeply pitted, the faucet body may need replacing.
Can I fix a leaky faucet without shutting off water?
Technically possible, practically foolish. Shutting off the under-sink valves takes ten seconds and prevents a geyser. Always shut it off.
My Faucet Fix Checklist
- Identify the faucet type. Compression, ball, cartridge, or ceramic disk. Photo it.
- Shut off water and plug the drain. Valves clockwise, rag in the drain. Non-negotiable.
- Bring the old part to the store. Match it exactly. Staff will help.
- Photograph disassembly. One photo per layer for foolproof reassembly.
- Test slowly and check below. Turn water on gently, watch for leaks, inspect the cabinet.
What I Would Do Next
My 25-minute fix has held for two years now, and the silence is genuinely luxurious. Every time I use that sink I feel a small, disproportionate pride. That is the secret reward of DIY plumbing: it is never just about the washer. It is about discovering the house is not as scary as you thought.
How to fix a leaky faucet without calling a plumber: shut off the water, plug the drain, swap the $6 washer or cartridge, reassemble, test. Twenty-five minutes, basic tools, and the drip is history.
Start this weekend. Your water bill, your sink, and your sanity will all improve.
Related reading: How Much Does It Cost to Replace Carpet with Hardwood Floors.
Related reading: How Much Does It Cost to Repaint a 3-bedroom House Interior.
Related reading: How Do I Choose the Right Size Air Conditioner for My Home.
For official guidance, check out Family Handyman project walkthroughs and EPA guidance on indoor air quality.