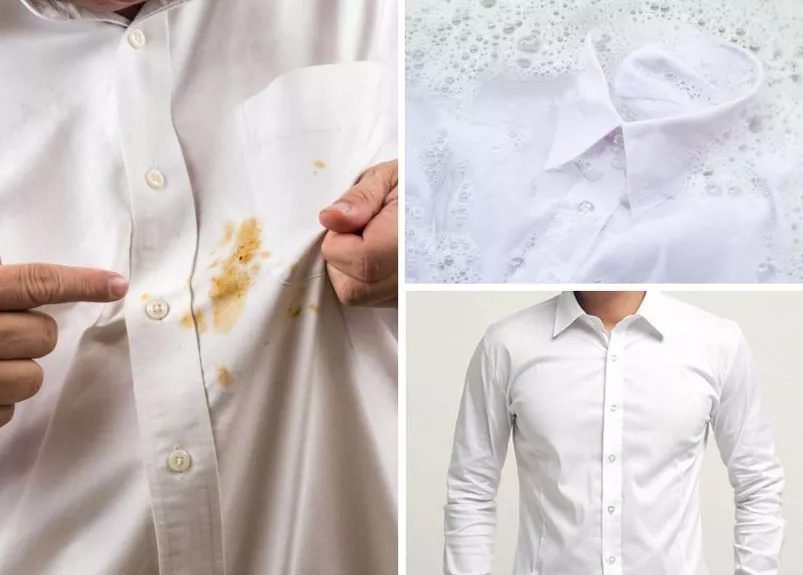
The red wine leaves the glass in a slow arc and lands, with terrible precision, on the only clean white shirt you own — an hour before you are due at dinner. What happens in the next ten minutes decides whether that shirt survives. Stain removal on white fabric is mostly a race plus a matching exercise: act fast, keep the stain wet, and match the treatment to what actually spilled. White shirts forgive effort and punish two things — heat and delay. Work through the steps in order and most stains, including the dramatic ones, come out.
What you need before you start
Everything required is probably already in your kitchen or bathroom: cold water, plain dish soap, 3% hydrogen peroxide (the standard brown-bottle kind), undiluted white vinegar, a clean white cloth or paper towels, and a little patience. One safety note that governs the whole list: these treatments are for white fabrics only. Peroxide and vinegar are safe on whites precisely because there is no dye to protect. Step one, whatever the stain: take the shirt off, and do not rub. Rubbing pushes pigment down into the fibers and spreads the edges. Blot, lift, and work from the outside of the stain inward.
Step 1: The cold-water rinse, within minutes
Run cold water through the back of the stain so the flow pushes the spill out the way it came in. For most fresh stains — coffee, wine, juice, sauce — this first rinse does the majority of the work before any product is involved, and it costs nothing but speed. Two rules never bend. Never use hot water on a fresh stain: heat sets protein and pigment stains permanently, the way cooking sets egg. And never put a stained shirt in the dryer or iron it; a stain that goes through heat is a stain you have chosen to keep. If you cannot wash the shirt now, keep the stain damp under a wet cloth until you can — a dried stain is a harder negotiation than a wet one.
Step 2: Dish soap for food and grease
For anything oily — salad dressing, butter, pizza grease, most food stains — dish soap is the secret weapon, because it is engineered to cut grease in a way laundry detergent is not. Work a drop directly into the stain with your fingertips, leave it for 10 minutes, then rinse and wash as usual. On most fresh food stains this outperforms specialty removers costing ten times more, and it is gentle enough to repeat if the first pass fades the mark but does not clear it. Check the spot against the light before the shirt goes anywhere near the dryer.
Step 3: Hydrogen peroxide for the tough ones
Blood, red wine that survived the rinse, grass, and the yellow underarm buildup on older shirts answer to 3% hydrogen peroxide. Apply it directly to the stain, wait 30 minutes while it fizzes quietly, then wash. Peroxide works as a mild bleach that is kind to white cotton and linen, and it is the correct tool for organic stains that soap alone cannot shift. Test any delicate white fabric — silk, wool — on an inside seam first, and give wool and silk to a dry cleaner instead if the stain is large. The manufacturer guidance collected in Tide’s guide to removing common stains matches this order of operations: treat first, wash second, heat never until the stain is gone.
Step 4: White vinegar for sweat and deodorant marks
The grey-yellow shadows at the underarms and collar of a white shirt are usually a buildup of deodorant residue, body oil and detergent, and they respond to acid rather than bleach. Soak the stained areas in undiluted white vinegar for 30 minutes before washing, and launder warm — warm, not hot, and only once the soak has done its work. The same chemistry explains the mirror problem on dark shirts, where the marks are white and chalky instead; the method transfers, and it is written up in the companion guide on how to remove deodorant stains from dark shirts. Prevention, once the shirt is rescued: let deodorant dry fully before dressing, and wash white shirts after one or two wears rather than letting the buildup compound.
Step 5: Sunlight, the free finish
After washing, dry a white shirt in direct sunlight when you can. Sunlight is a genuine mild bleach — ultraviolet light breaks down the residual pigment that survives the wash, and it costs nothing. A shirt that comes out of the machine at 95% clean often finishes the last 5% on the line. This works only for whites; the same sun fades colored fabric unevenly. In winter or in a flat without outdoor space, a windowsill gets part of the effect.
The stain-by-stain playbook
Coffee and tea. Blot, then cold rinse. If a shadow remains, dish soap worked in and left for ten minutes, then wash. Milk in the coffee makes it a protein stain as well — keep everything cold until it is out.
Chocolate. Scrape off the excess with a dull knife first; chocolate smeared is chocolate spread. Then cold water and dish soap. Warm water at any point before the stain is gone melts the cocoa butter deeper into the weave.
Grass. A green stain is a dye stain. Pre-treat with white vinegar or peroxide for 30 minutes, then wash. Grass on white cotton usually surrenders; grass that has been through a dryer usually does not.
Ballpoint ink. The odd one out: water does nothing. Dab with rubbing alcohol on a cloth placed under the stain, blotting so the ink transfers down into the cloth rather than across the shirt. Work in small circles and change the cloth as it picks up color. Wash only when the blotting comes away clean.
Makeup and foundation. Oil-based, so treat as grease: dish soap first, no water before the soap has had its ten minutes on the dry fabric. A makeup wipe makes a passable emergency field treatment.
The wash itself: temperature, load and detergent
Once the stain is treated, the wash should support it rather than undo it. Wash whites together — a single dark sock in the load can grey a whole set of shirts over time — in the warmest water the care label allows, since whites tolerate heat once stains are treated and out. Use a detergent with enzymes for food and body stains, and consider an oxygen-based bleach booster (sodium percarbonate) for the load: it is color-safe chemistry that is genuinely effective on whites and far gentler than chlorine bleach, which yellows some fabrics and weakens fibers with repetition. Do not overload the machine; stain removal is partly mechanical, and clothes packed tight cannot move against each other. When the cycle ends, inspect before drying — the dryer question is always the same: is the stain fully gone? If a ghost remains, repeat the matching treatment while the shirt is still wet. A wet ghost is a treatable stain. A dried one is a memory.
The blotting rule, and why rubbing ruins rescues
One technique decides most rescue outcomes before any product is chosen: blot, never rub. Rubbing a fresh stain does three kinds of damage at once — it drives pigment deeper between the fibers, it spreads the stain’s edge into clean cloth, and on cotton it roughens the surface so the treated area later holds dirt differently from the rest of the shirt, leaving a ghost even when the color is gone. Blotting lifts instead: press a clean white cloth or paper towel straight down, hold for a few seconds, lift, and move to a clean patch of the cloth. Repeat with patience rather than force. The same rule governs the wash-side treatments — dab peroxide or dish soap on, let chemistry do the work during the wait, and resist scrubbing the spot with a brush on anything finer than a work shirt. In stain removal the patient hand beats the strong product surprisingly often.
Keeping white shirts white between rescues
Most white shirts are not killed by one dramatic stain. They are greyed by process — washed with colors, stored with deodorant residue baking in, worn five times between washes so body oil sets at collar and cuff. Prevention is three habits. Wash whites as their own load, always, even when the load is small. Pre-treat collars and underarms with a little dish soap or an enzyme spray before the wash rather than after a stain announces itself — the buildup is a slow stain, and it responds to the same chemistry applied early. And hang shirts to dry rather than tumble-drying by default: dryers bake in whatever the wash missed and yellow elastic and fibers over time. A shirt cared for this way needs the rescue steps above a few times a year, at parties and accidents, instead of once a month as a way of life.
Knowing when to surrender
Some stains are professional work: anything on silk or wool that covers a large area, ink from a burst pen, dye transferred from another garment in a mixed wash, and any stain that has already been through the dryer. A dry cleaner with the shirt in hand the same week — stain untreated, and tell them what spilled and what you already applied — rescues shirts that home treatment would ruin. The honest summary of the whole process: cold water fast, dish soap for grease, peroxide for the organic stains, vinegar for sweat, sunlight to finish, and heat absolutely last, only when the fabric is clean. Keep those five moves in order and a white shirt stops being a high-risk garment and goes back to being the most useful one you own.