Rubbing toothpaste on a yellowed headlight feels thrifty and clever for about ten minutes. The lens looks a little clearer, you rinse it off, and you drive away pleased. Then, a few weeks later, the haze is back, because the internet’s favorite fix never stood a chance against Texas sun. The mistakes come first here, because nearly every failed headlight job fails in one of the same few ways, and spotting them is the fastest route to a fix that actually lasts through a summer.
Mistake 1: Trusting toothpaste and baking soda as a real fix
Toothpaste and baking soda pastes are mild abrasives. Rubbed on with a cloth, they polish the surface of the lens and knock back the lightest haze, which is why the before-and-after photos look so convincing. What they do not do is just as important. They add zero UV protection, and they never reach the deeper oxidation sitting below the surface. So the lens re-yellows within weeks, a bit faster each time, while the driver concludes that restoration itself does not work. It does work. This shortcut is just a polish pretending to be one. Use it, at most, as a quick touch-up before a trip or an inspection, and know that the clock on it is measured in weeks.
Mistake 2: Polishing without sanding first
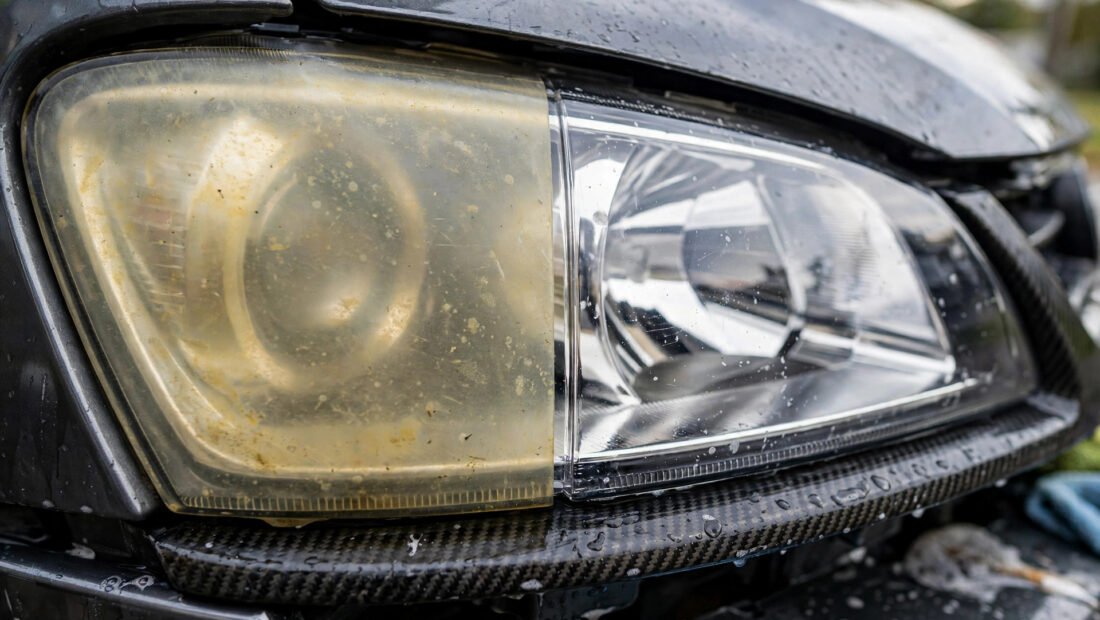
Yellowing is not dirt sitting on the lens. It is damaged plastic, and on a Texas car that damage often runs deeper than the top film. Polishing a deeply clouded lens without sanding is like waxing a rusty panel: the shine improves for a day and the problem underneath stays exactly where it was. The cloudy layer has to come off physically before polish can do its job. Skipping the sanding stage is why so many people polish hard, see a faint improvement, and give up an hour later convinced their headlights are beyond saving. Most of the time, the lens was fine. The order of operations was wrong.
Mistake 3: Skipping the sealant and throwing away the whole job
This is the costliest mistake, because it wastes an otherwise good restoration. Freshly polished polycarbonate has no defense left. The factory coating that once shielded it is gone, and bare plastic facing Texas UV clouds again in months. A driver who sands and polishes beautifully, then skips the UV sealant, has done 90 percent of the work for 10 percent of the lifespan. The sealant is not an optional finishing touch or an upsell in the box. It is the step that decides whether the job lasts a season or lasts years.
Mistake 4: Sanding dry, or sanding without masking the paint
Two technique errors travel together. Sanding dry loads the paper with plastic dust, cuts unevenly, and can leave deeper scratches that later stages struggle to remove. Water is not a nicety here; it keeps the paper cutting cleanly and the surface cool. The second error is skipping the painter’s tape around the lens. Sandpaper does not know where plastic ends and paint begins, and one slip across the fender edge trades a headlight problem for a paint problem. Masking takes three minutes. Repainting a scuffed panel costs real money. Consumer Reports’ headlight testing and car care guidance makes the same point about method mattering as much as product, and headlights reward careful prep more than brute effort.
Why Texas lenses die young
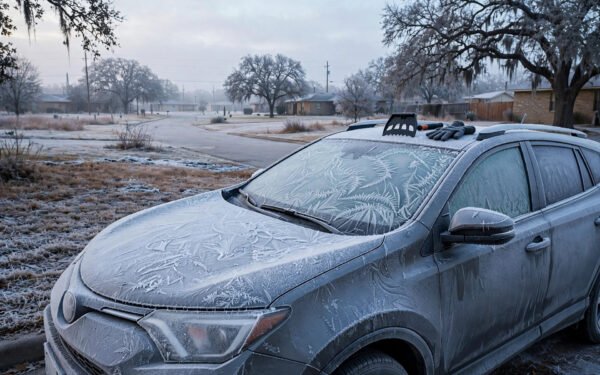
A modern headlight lens is polycarbonate, a tough, light plastic, covered at the factory with a thin UV-protective coat. Sunlight breaks that coat down first. Once it fails, UV reaches the plastic itself, and the plastic oxidizes and clouds from the surface inward. Texas speeds up every stage of that story: 300-plus days of strong sun each year, 100-degree heat baking parked cars for hours, and some of the highest UV indexes in the country. A car that sleeps in a garage ages slowly. A truck that bakes in an open lot at work ages in fast-forward.
Treat the result as a safety problem, not a cosmetic one. A heavily clouded lens can lose the large majority of its light output, scattering what remains instead of throwing it down the road where you need it. You see less of the road, and the light you do see at night gets worse the longer the haze builds. Drivers often blame their eyes or their bulbs. Very often, the lens is the dimmer switch nobody asked for. That is also why clear headlights belong in the same safety conversation as what to include in an emergency kit for your car: both are about not being caught helpless on a dark road far from home.
The correct way, in order
Buy a dedicated restoration kit, priced around $15 to $30. The well-known kits from 3M, Sylvania, and Meguiar’s all follow the same shape, and that shape matters more than the brand on the box. You get graded sandpapers, a polish, and a UV sealant, in one package matched to the job.
Start by washing the lens and drying it, then mask the surrounding paint and trim with painter’s tape, pressing the edges down firmly. With the lens protected around its borders, begin wet-sanding with the coarsest paper in the kit, roughly 1000 grit. Keep the surface wet, use steady strokes, and rinse often so you can see your progress. The lens will look worse at this stage, uniformly frosty from edge to edge. That frost is correct. It means the dead, yellowed layer is coming off evenly.
Move to roughly 2000 grit, still wet, and sand until the surface feels smoother and the heavier scratches from the first stage fade. Then finish the sanding with roughly 3000 grit. Each finer paper erases the marks of the one before it, and rushing this ladder is how cloudy patches survive a restoration. When the lens looks evenly hazy with no yellow patches left, polish it with the compound in the kit, by hand or with a drill attachment if the kit provides one, until the clarity snaps back. Wipe it clean and admire it for exactly one minute.
Then seal it, immediately, with the UV sealant included in the kit, following its timing and coating directions. Budget 45 to 60 minutes per headlight the first time you do this. The second light goes faster, because your hands have learned the pressure and the pace. Expect the transformation to be dramatic: frosted yellow to clear glass, and a beam at night that suddenly reaches the road signs again instead of dying ten feet ahead of the bumper.
How long it lasts, and the other options
Be straight about durability. A sealed restoration typically lasts one to three years in Texas conditions before haze starts creeping back. An unsealed one lasts months. Shade, a carport, and a yearly sealant refresh push you toward the long end of that range. Nothing you apply by hand in a driveway fully equals the original factory coat, so plan on the refresh rather than feeling cheated when the second year asks for one.
If you would rather pay than sand, the professional option runs about $75 to $150. A shop machine-polishes the lenses and applies a proper UV clear coat, which tends to be more even and more durable than a first-time home effort. That price makes sense for severely degraded lights, high-value cars, or anyone who knows they will rush the sanding ladder. Get two quotes, since prices for the same hour of work vary widely.
Replace instead of restore when the damage is no longer on the surface. A cracked lens cannot be polished whole. A lens holding moisture inside has a failed seal, and clearing the outside does nothing for the fog trapped within. A damaged or dull reflector behind the lens caps your light output no matter how clear the cover gets. Replacement assemblies run about $150 to $400 for mainstream cars aftermarket, and $500 to $1,500 or more for luxury and LED units, so the decision is worth a careful look before you order. If the lens is intact, dry inside, and merely yellow, restore first. That is the cheap, satisfying case, and it is most Texas cars.
Keeping them clear, and a word on bulbs
Prevention in Texas is mostly shade strategy. Park under cover whenever you can. A $50 car cover pays for itself across headlights, paint, and interior, because it blocks the UV that ages all three. When you wax the car, run the wax or sealant over the headlights too, and refresh that protection rather than waiting for yellow to announce itself again. Small, regular protection beats heroic restoration every few years.
Finally, restore first before you shop for brighter bulbs. A brighter bulb behind a cloudy lens mostly makes brighter fog, since the haze scatters whatever light passes through it. Drivers chase bulb upgrades, spend the money, and see barely any gain, because the bottleneck was never the bulb. LED swaps into housings built for halogen bulbs add another problem: they can throw glare at oncoming traffic and fall foul of the rules on approved lighting. Clear the lens, aim the lights correctly, and fit good standard bulbs. On a dark Texas highway, a clear lens with an ordinary bulb will beat a cloudy lens with an exotic one every single night.