Four boxes can solve the same kitchen problem, and they could hardly be more different. One is full of live worms under your sink. One pickles your scraps in a sealed bucket. One is a countertop machine that dries and grinds at the push of a button. One is not in your kitchen at all — it is a drop-off bin across town. All four claim to compost in an apartment with no yard. Only some of them finish the job, and the right pick depends on your space, your budget, and how much fuss you will honestly tolerate in month three.
Start with what you throw away. A small apartment kitchen still produces coffee grounds, vegetable peels, eggshells, stale bread, and leftovers that missed their chance. Sent to a landfill, that material breaks down without air and releases methane. Kept in a working compost system, the same scraps become a dark, earthy material that feeds soil. Cutting the waste at the source helps as well, and how to reduce food waste in your kitchen pairs naturally with any method below: compost what remains, waste less to begin with.
Option One: The Worm Bin
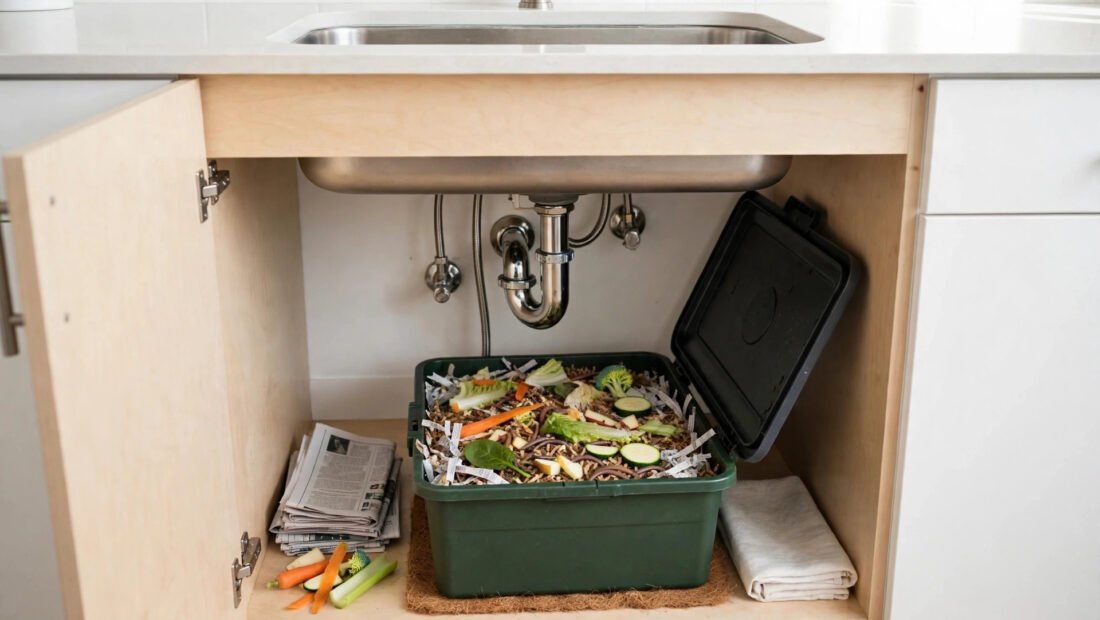
A worm bin is a lidded plastic tote, roughly 10 to 18 gallons, with air holes and a bed of damp shredded newspaper or cardboard. Into it goes about a pound of red wigglers — roughly 1,000 worms, typically about $30 to $50 from an online seller or a Texas worm farm. The footprint is about 2 square feet, small enough for under a sink or in a closet. The worms eat fruit and vegetable scraps, coffee grounds and filters, tea bags with staples removed, and crushed eggshells. Buried under the bedding, food disappears without a smell. A healthy bin smells like forest soil, plain and simple.
The daily math is generous. Worms eat about half their body weight a day once the bin settles, and you feed two or three times a week rather than daily. Keep the bedding damp like a wrung-out sponge, and harvest the finished castings every 3 to 4 months. Cost after setup is near zero. The limits are real, though. Worms take no meat, dairy, or oils, and only small amounts of citrus, onion, and garlic. Fruit flies appear if food sits exposed on top; bury it deeper and the problem ends. The Texas limit is heat. Worms die at roughly 85 degrees and above, so the bin lives indoors in air conditioning. A summer balcony, even a shaded one, can kill the colony in an afternoon.
Option Two: Bokashi Fermentation
Bokashi works on a different principle. Instead of breaking scraps down with air and worms, it pickles them. You layer scraps in an airtight bucket — a 5-gallon kit with a drain spigot typically runs about $40 to $60 — sprinkling each layer with bokashi bran, which is grain bran carrying helpful microbes. Press the scraps down, seal the lid, and drain the liquid that collects. In about 10 to 14 days the contents are fully fermented, with a faint pickled smell when you open the lid and no smell at all while it stays sealed.
Its great strength is range. Bokashi takes meat, dairy, cooked food, and small bones that a worm bin refuses, which makes it the easiest fit for a household that wants one bin for everything. The drained liquid, diluted heavily — about 1 part to 100 parts water — can feed houseplants. The honest weakness is the finish. Fermented scraps are not yet compost. They are preserved, acidic material that must spend about 2 to 4 weeks buried in soil before it becomes mild and plant-ready. With no yard, that means a large planter of soil on hand, a community garden plot, or a friend with a garden who will take it. Price that second step in before you buy, because bokashi without a burial plan stalls at the bucket.
Option Three: The Electric Countertop Unit
Electric units take the opposite bet: no biology to manage at all. You drop scraps in, press a button, and heat and grinding reduce them over a few hours to a dry, crumbly output at a fraction of the volume. There are no worms to keep alive, no smell while the sealed cycle runs, and almost no learning curve. The footprint is that of a large kitchen appliance, and most scraps, including small amounts of meat and dairy, can go in depending on the model.
The trade-offs are money and honesty about the output. Units typically cost about $300 to $500 up front, use electricity on every cycle, and need filter or additive refills on some models. More important, the output is dried, ground scraps — not true compost. No microbes have done the slow work of turning it into stable soil food. It still has value: stir it into potting soil, add it to a worm bin as dry material, or donate it to a garden. Just buy it for waste reduction and convenience, not under the belief that the machine finishes composting overnight. For a busy household that knows it will abandon any system needing care, that convenience can be the difference between a system used daily and a bin forgotten by spring.
Option Four: Community Drop-Off
The fourth box removes the process from your home entirely. You collect scraps in a countertop container with a charcoal filter lid — about $20 — lined with compostable bags, and you drop the bags at a city program, a farmers market collection point, or a community garden that accepts them. Many Texas cities run some version of this, and Austin’s curbside composting is the best-known example. Freezing scraps between drop-offs is the home cook’s trick here: frozen peels and grounds do not smell and do not draw fruit flies.
On cost and effort, nothing else comes close. There is no equipment to maintain, no colony to keep alive, no second step to arrange, and no output to store. The weaknesses are access and control. You need a drop-off point you will actually reach every week or so, with hours that fit your life, and rules that vary by program — some take meat and dairy, many do not. If the nearest point is a thirty-minute drive, the system fails on friction, not on principle. For renters who move often, though, drop-off has one quiet advantage: nothing to pack, sell, or give away when the lease ends.
The Side-by-Side Trade-Offs
Line the four up on what decides daily life. On finished compost, the worm bin wins outright: it is the only home method here that delivers true, ready castings with no second step. Bokashi finishes only with soil burial. Electric output needs soil time to become compost in any full sense. Drop-off gives you no compost back at all in most programs — the value leaves with the bag, which is fine if your goal is landfill diversion rather than soil.
On range, bokashi wins, with electric units close behind. On cost, drop-off wins at near zero, the worm bin is next at a small one-time outlay, bokashi sits in the middle with ongoing bran costs, and electric units cost the most by a wide margin. On daily effort, drop-off and electric units ask the least; bokashi asks for layering and draining; the worm bin asks for feeding and the occasional moisture check. On risk, the worm bin carries the only living risk — heat — while bokashi carries the planning risk of an unfinished bucket and electric units carry the repair risk of any appliance. For general home composting standards and safety notes, the EPA’s guidance on composting at home is a solid reference whichever route you pick.
The Question That Arrives in Month Three
New composters plan for scraps. Few plan for the harvest. A worm bin will hand you rich castings every few months whether you have a garden or not, so decide early where they go. Houseplants are the first answer: top-dress pots monthly or mix castings into potting soil at about one part castings to four parts soil. A windowsill herb planter uses a steady small supply and rewards you at dinner. Gardening friends and community gardens will gladly take the surplus, and local plant swaps treat good castings as currency.
There is even a small market. Bagged worm castings commonly sell for about $10 to $20 for a few pounds at farmers markets, which will not pay the rent but can cover the cost of bedding and the next bag of bran many times over. Bokashi users face the same question in reverse — their output needs a soil home — while drop-off users never face it at all. Match the output to your life before you match the bin to your counter.
The Verdict, by Kitchen and by Person
For most apartment kitchens, start with the worm bin. It costs the least to run, takes about 2 square feet, produces the best finished material, and asks for minutes a week once you learn to bury food and watch moisture. Choose it if you mostly eat plants, keep the apartment air-conditioned, and like the idea of a small living system doing steady work. Order worms from a Texas supplier in summer so they travel a short, cooler route.
Choose bokashi if your scraps include a lot of meat, dairy, and cooked food and you have a real burial plan — a big soil planter or a garden contact — because its range is unmatched and its sealed bucket suits small, shared kitchens. Choose an electric unit if your budget allows roughly $300 to $500, your schedule allows almost no care, and you value volume reduction over finished compost. Choose drop-off if a collection point sits on a route you already travel, or if you move often and want zero equipment. The best system is not the most impressive one. It is the one still running, without smell or dread, on an ordinary Tuesday in month three.