
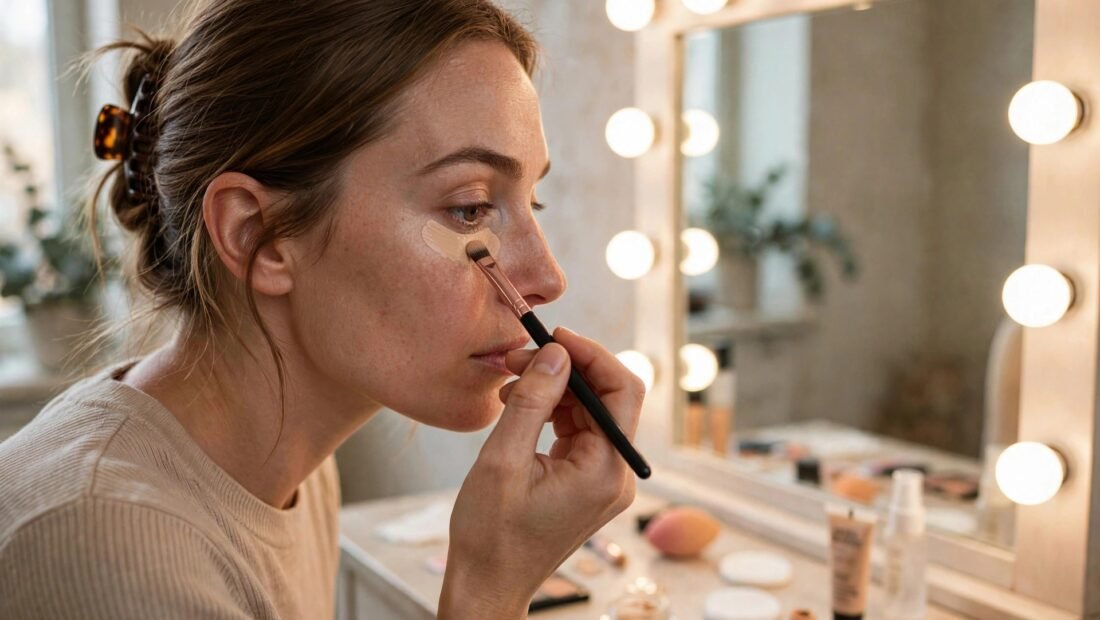
By 2 p.m. the concealer that looked smooth at breakfast has dropped into every fine line it was meant to hide. The usual suspect is Texas humidity, and humidity does make things worse. The real decision point came hours earlier, around 7 a.m., when the skin was prepped, the product went on, and the amount was chosen. Creasing is mostly set up in the morning. Fix the morning routine and the afternoon problem shrinks a lot.
Why the under-eye area creases first
The skin under the eyes is the thinnest skin on the face. There is very little padding underneath it, so every line shows quickly and every extra layer of product shows too. It also moves all day long. Blinking, smiling, squinting at bright light, and rubbing tired eyes all fold that thin skin again and again. Makeup sitting on top gets pushed along with it.
Product follows a simple path. If there is more concealer than the skin can hold flat, the surplus has to go somewhere. It collects in the folds. Heat and natural oil help it travel. Dry patches make it worse in a different way, because dry skin grabs product unevenly and leaves rough edges that catch the light. That is why the same concealer can look fine on the cheek and fail under the eye within a few hours. The area is difficult because of thin skin, constant motion, and very little room for error.
Step 1: Prep the skin and let the prep finish
Start with damp skin. After washing the face or splashing it with water, pat it so it is damp rather than dripping, then apply eye cream. Damp skin takes in a light cream more evenly than bone-dry skin, and a thin, even layer is the whole point. Use a small amount. A pea-sized amount shared between both eyes is plenty for most people. Tap it on with the ring finger, which naturally presses more lightly than the other fingers, and keep it on the orbital bone rather than right up against the lashes.
Then wait. Give the cream a full 3 to 5 minutes to absorb before any makeup touches the area. Set a timer if mornings run fast, brush teeth, or pick out clothes during the wait. The wait is not wasted time. It is the step that decides whether concealer grips or slides. Makeup layered over cream that is still wet on the surface will move within the hour, no matter how good the concealer is. Makeup layered over cream that has settled in stays where it was placed much longer.
A common worry is that eye cream itself causes creasing. It does not, on its own. Dry under-eyes crease faster because the skin is rough and the product has nothing smooth to sit on. The problem is excess cream and no wait time. A thick layer that never fully absorbs leaves a slick surface, and concealer floats on that surface straight into the lines. In Texas heat, a lightweight gel or light lotion texture also helps. Heavy, rich balms are useful at night. In the morning, especially in summer, they leave too much slip under makeup.
Step 2: Use less product and place it only where it is needed
The single biggest cause of creasing is amount. Most people apply two or three times more concealer than the under-eye area can wear well. A better approach is to treat concealer like a targeted cover, not a base layer for the whole zone. Look in the mirror and find the darkest part, which for most people is the inner third and a small area just below it. That is where the product belongs. The outer corner and the area right under the lower lashes often need little or nothing.
Place small dots only on that darkest area. Three small dots are enough to start. Resist the large triangle shape that runs from the inner corner down the side of the nose and back up to the outer corner. That shape puts the most product on the most mobile part of the face, the inner corner, and it almost guarantees a crease by midday.
Blend with a damp sponge or the ring finger, using pressing and tapping motions rather than dragging. Dragging pulls thin skin and smears product into lines before it has even set. Pressing pushes a thin film evenly across the surface. Look straight ahead into the mirror while applying. Looking up stretches the skin smooth, which feels helpful, but product applied to stretched skin settles into the folds as soon as the face returns to its normal position. Straight-ahead application shows the lines as they really are, so product can be kept out of them.
Build in thin layers only if one layer is not enough. Let the first thin layer settle for a moment, check the result in natural light if possible, and add a second thin layer only on the spot that still shows through. Two thin layers wear better than one thick one because each layer is light enough to flex with the skin. Thick layers crack and shift as a single slab. The same placement logic helps with other targeted coverage too, and the approach behind how to cover dark spots with makeup naturally follows that same idea of covering the spot itself and leaving the surrounding skin alone.
Formula choice supports this step. Thin, serum-like concealers crease the least because they leave a flexible, light film. Creamy medium-coverage formulas can work well when used sparingly. Thick full-coverage sticks crease the most, because they deposit a heavy layer that has nowhere to go except into lines. A long-wear formula that stays slightly flexible usually beats a very dry matte formula in Texas weather. Very dry matte products look smooth for an hour and then crack over thin, moving skin.
Step 3: Set with a tiny amount of powder, pressed on
Setting is necessary, but the dose matters more than the brand. Use a finely milled loose powder, pick up a very small amount on a small brush or a powder puff, and tap or shake off the excess before the brush touches the skin. If powder is visible as a cloud on the brush, there is too much. Press the powder gently onto the concealer. Do not sweep. Sweeping drags the concealer underneath and reopens the lines that careful blending just avoided.
Timing matters here as well. Check the concealer before powder goes on. If a line has already formed during blending, smooth it out first with a clean fingertip or the damp sponge, then set. Powder applied over wet or already creased concealer freezes the problem in place. Powder applied over a smooth, settled thin layer helps hold that smooth finish for hours. Work one eye at a time so the check actually happens instead of becoming a rushed habit.
The baking question comes up often, and Texas summer changes the answer. Baking means packing a thick layer of powder under the eyes and leaving it for 5 to 10 minutes before brushing it away. In dry climates and in strong air conditioning, that heavy set can hold up. In Texas humidity, the thick powder tends to mix with heat and oil through the day and cake by afternoon. For most summer days, skip baking. A light pressed set, plus a light mist of setting spray if extra hold is needed, lasts longer and looks better by late afternoon. Detailed technique comparisons in Allure’s makeup application guides return to the same point from different artists: thin layers and light setting outlast heavy layers almost every time.
Step 4: Maintain at midday without rebuilding the whole area
Even a careful morning routine meets Texas heat, sun glare, and long afternoons. Midday care should be small and corrective, not a second full application. Start by blotting. Press a blotting sheet, a clean tissue used lightly, or a clean sponge under the eye to lift oil and moisture. Blotting removes the thing that helps product travel, without adding anything new.
Next, smooth before adding anything. If a crease has formed, press and roll a clean fingertip or a clean sponge edge gently along the line to soften and redistribute the product that is already there. Body heat from a fingertip helps the product settle flat again. Only after the surface looks smooth should any powder be added, and then only the lightest touch, pressed on with a small brush or puff. Powder first and smoothing second is the wrong order. Powder over a crease makes the crease harder to fix and easier to see.
Do not layer fresh concealer over creased concealer. That is how a thin morning layer turns into a thick afternoon patch that creases even faster. If coverage has truly faded in one small spot after smoothing and blotting, a tiny dot blended only into that spot is enough. Most days, smoothing and a whisper of powder solve the problem without new concealer at all.
The mistakes that undo careful work
Three errors account for most creasing complaints. The first is too much concealer, applied across the whole under-eye instead of only on the darkest area. The second is powder over wet concealer, which locks in a finish that was never smooth. The third is skipping the wait after eye cream, so makeup starts the day on a slick surface. Each error alone can cause creasing. Together, they make creasing nearly certain, even with expensive products.
Two more habits add to the problem. Layering full-coverage foundation under the eye and then adding concealer on top doubles the product load on the thinnest skin on the face. Keeping foundation sheer or absent in that zone and letting concealer do the targeted work wears far better. And choosing the thickest, driest formula for maximum coverage usually backfires by afternoon. Coverage that flexes lasts. Coverage that sits heavy moves.
The routine that holds up in Texas is not complicated. Prep on damp skin, wait the full 3 to 5 minutes, place a small amount only where darkness actually shows, blend by pressing while looking straight ahead, set with a tiny amount of pressed powder, skip summer baking, and fix midday shine by blotting and smoothing before touching powder again. Done in that order, under-eye makeup lasts through the day it was applied for.